API Documentation
API Documentation
API keys
API keys are used for authentication between your application and Truecaller for Business APIs. These keys can be applied for the use cases described in detail below.
If you wish to use Truecaller for Business APIs for any of the use cases below please reach out to cs@truecaller.com
Overview
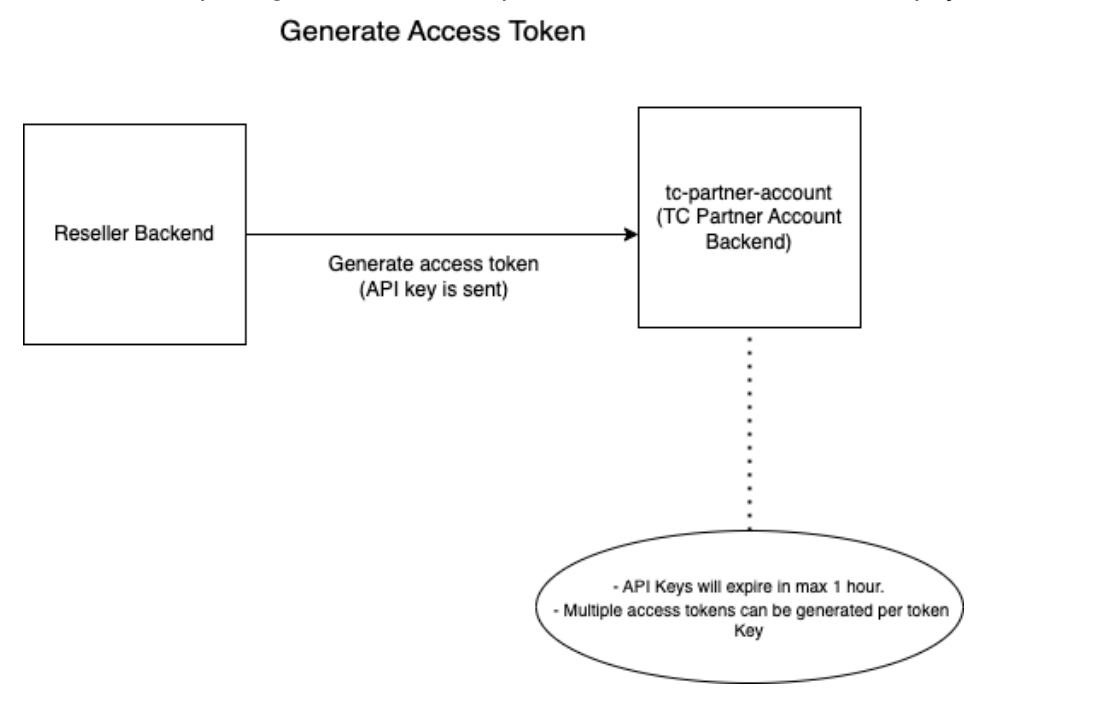
- Clients will be able to create & manage access to the APIs via the self-serve portal itself. The Secret Key & Key ID will be used to generate the token required for authorization of subsequent API requests to the TC platform. This token generated will be valid for one hour.
- Clients will only be able to generate 5 APIs in concurrent use at a time. Users will not be able to see the secret key & key ID once generated, hence users should be copying the same and saving it in a safe & secure folder.
- Clients will be able to download user-generated feedback response logs via GET APIs for Call Me Back & User Feedback. These are similar in format to the file downloaded via the self-serve. The file URL provided in the API key will be valid for 10 mins, client should be able to export the file before expiry.
- APIs can also be used for Call Management which temporarily assigns assets like Call Reason, Logo etc. This is explained in detail, under Call Management APIs (This feature is in EAP, please reach out to cs@truecaller.com to register your interest).
API Use-cases
- There are two functions for which users can set up API keys
- Export data using APIs:
- Call Me Back - Logs for call me back requests
- User Feedback - Responses for user feedback
- Call Management APIs
- Clients with access to Call Management feature can configure a new type of label (dynamic label) on self-serve.
-
Clients will be able to use the API key through which they can
upload,
- Caller & receiver numbers
- Dynamic label ID
- Caller ID
- Call reason
- Start & end time
- Max TTL will be 24hrs i.e. difference between end time and start time cannot be more than 24 hrs. These APIs will be protected by the API keys generated via the Open API feature.
Creating API keys
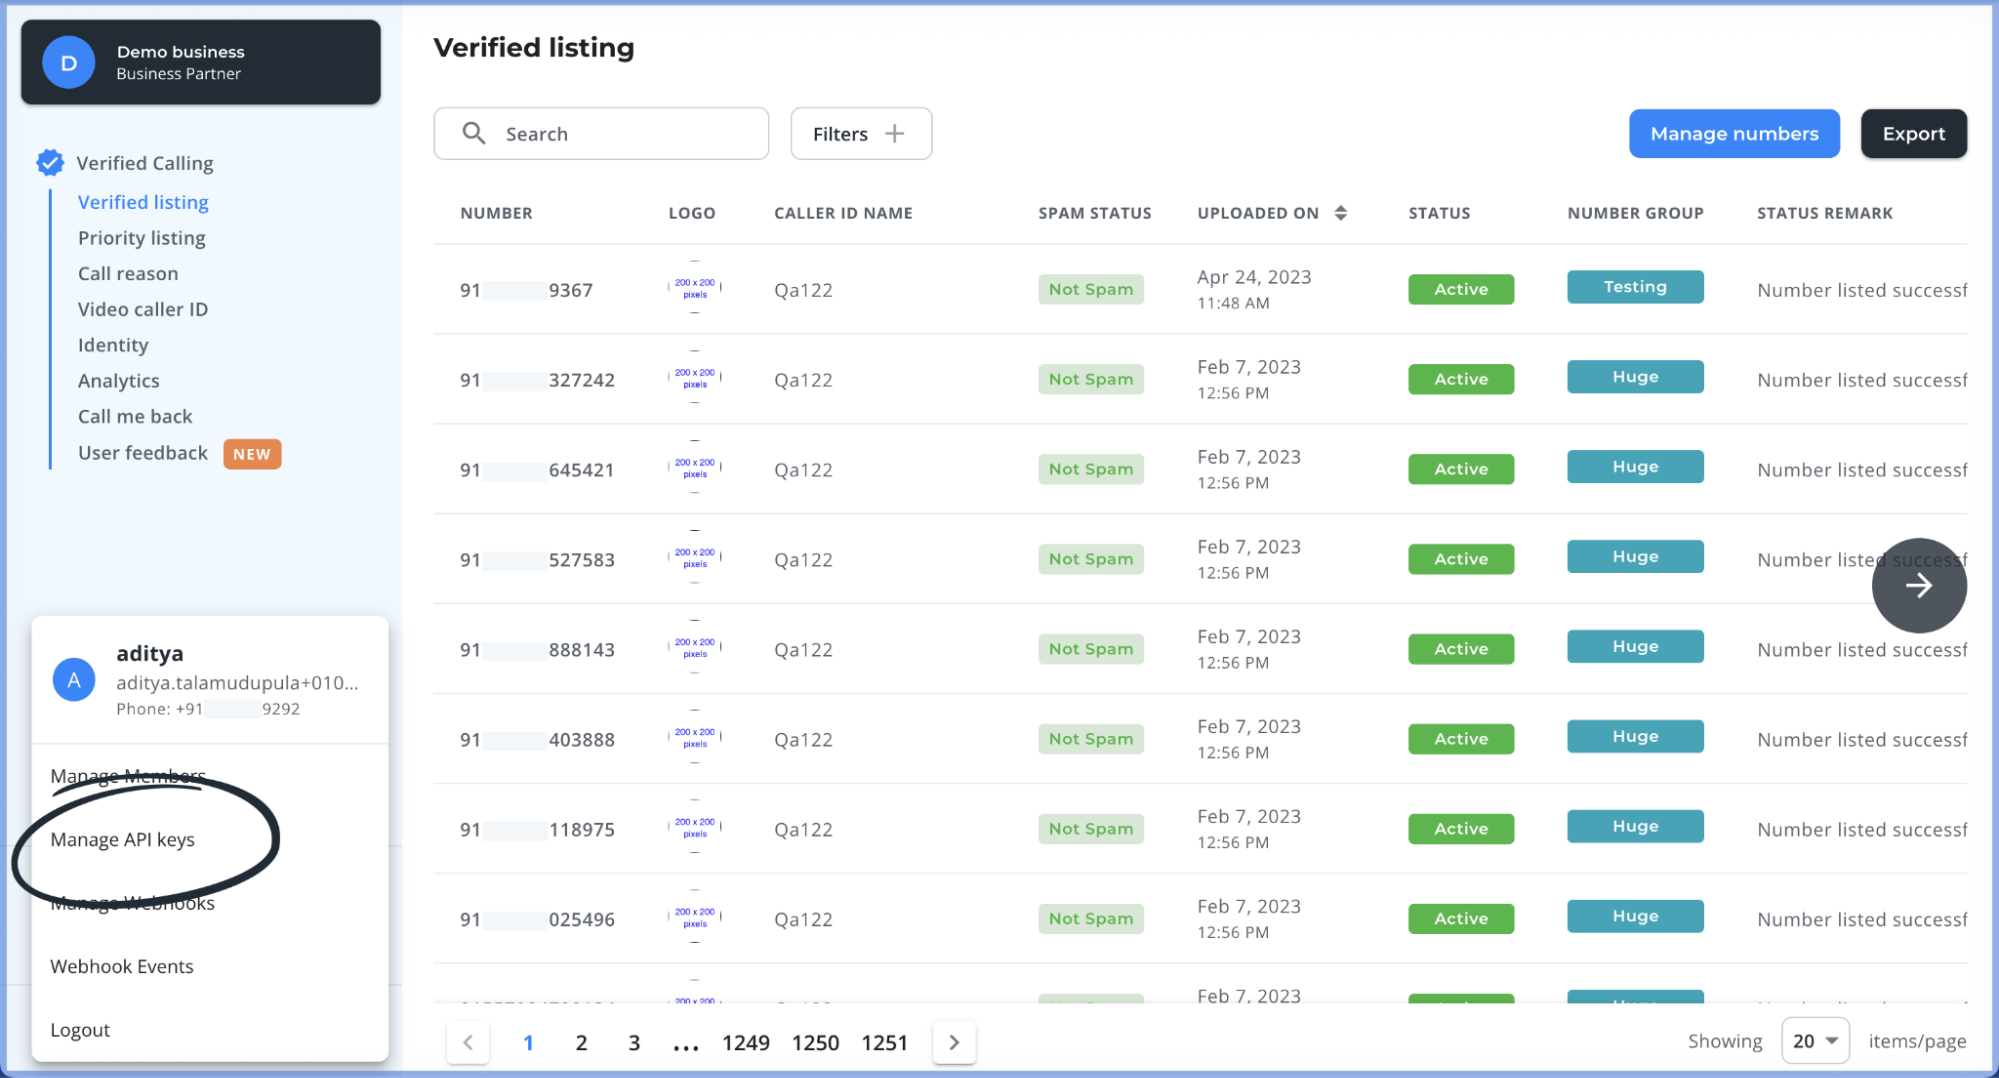
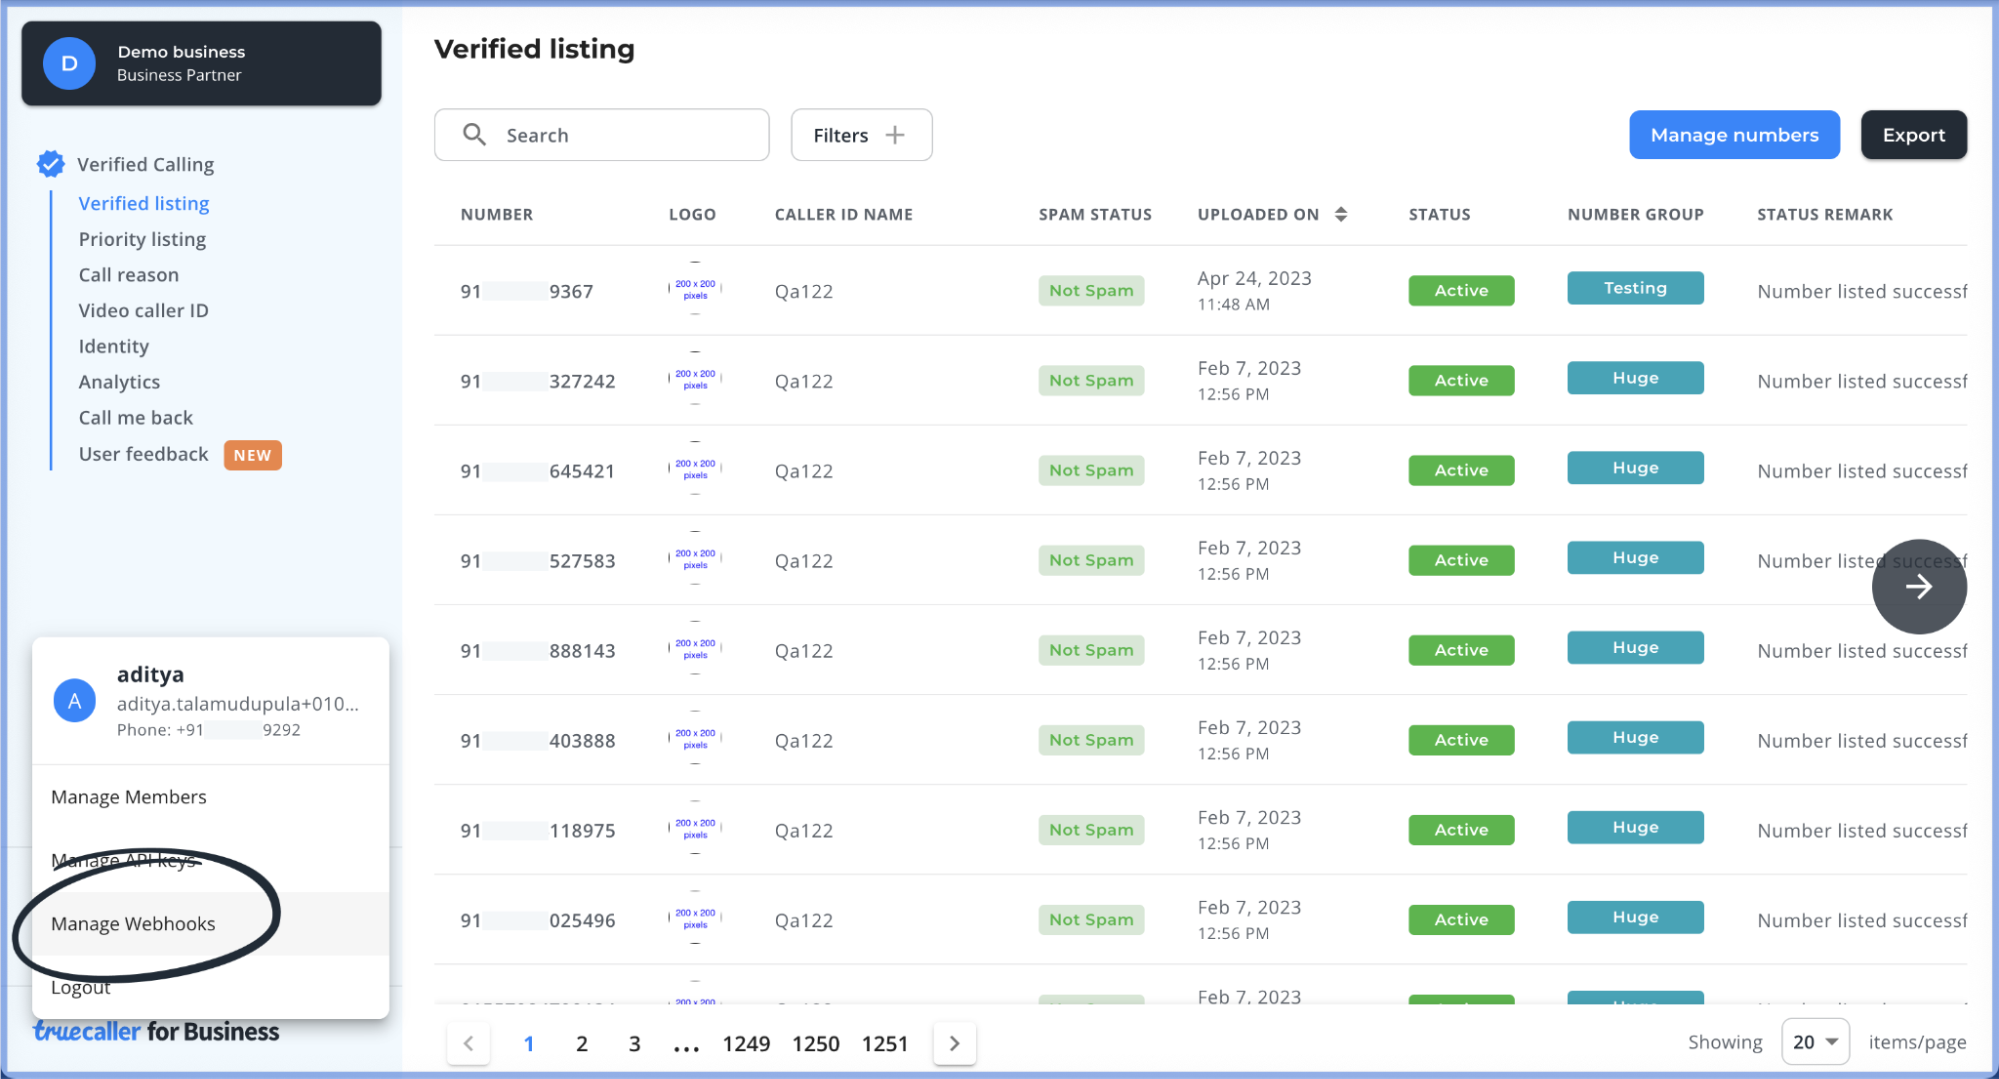
- Click on “Manage API Keys” from the overflow menu.
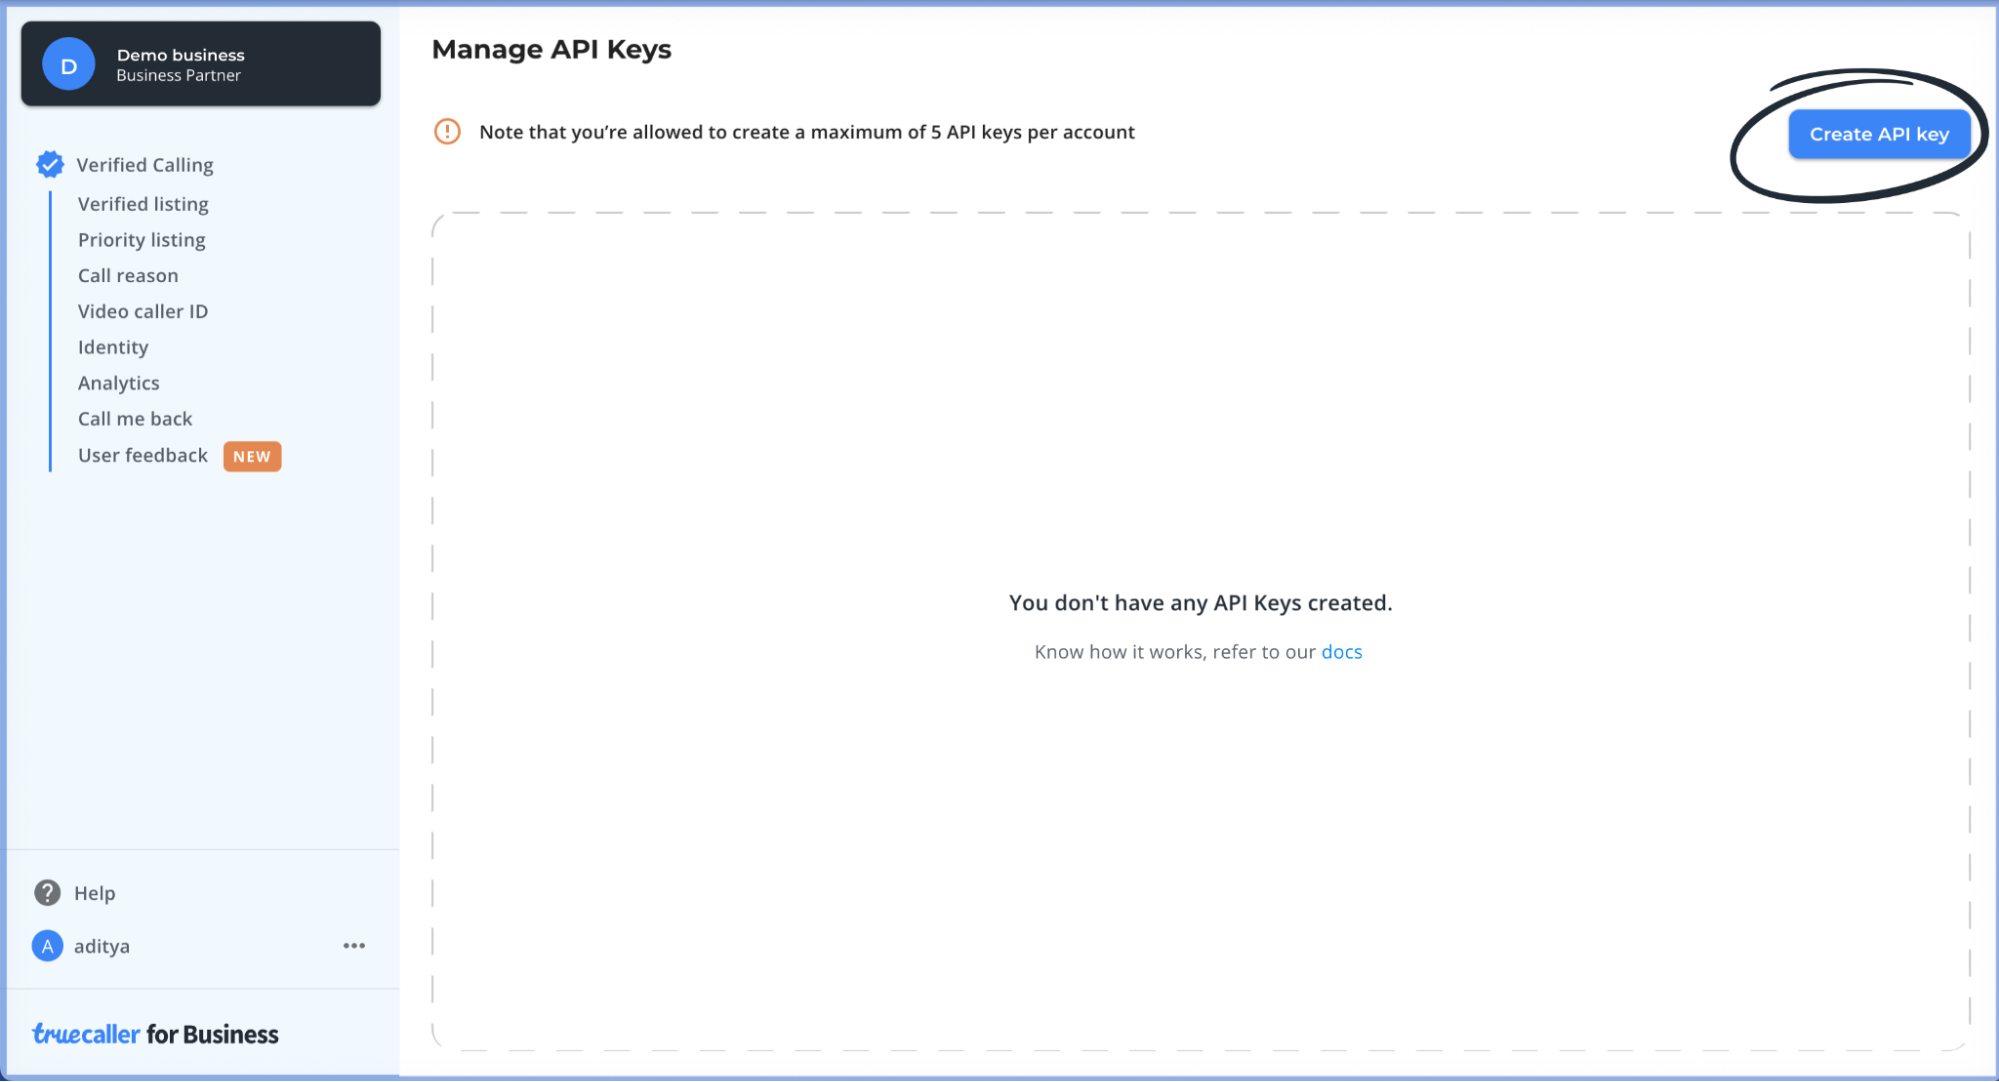
- A first time user visiting this screen will find an empty state with an option to “Create API Key”. Click on the “Create API Key” button.
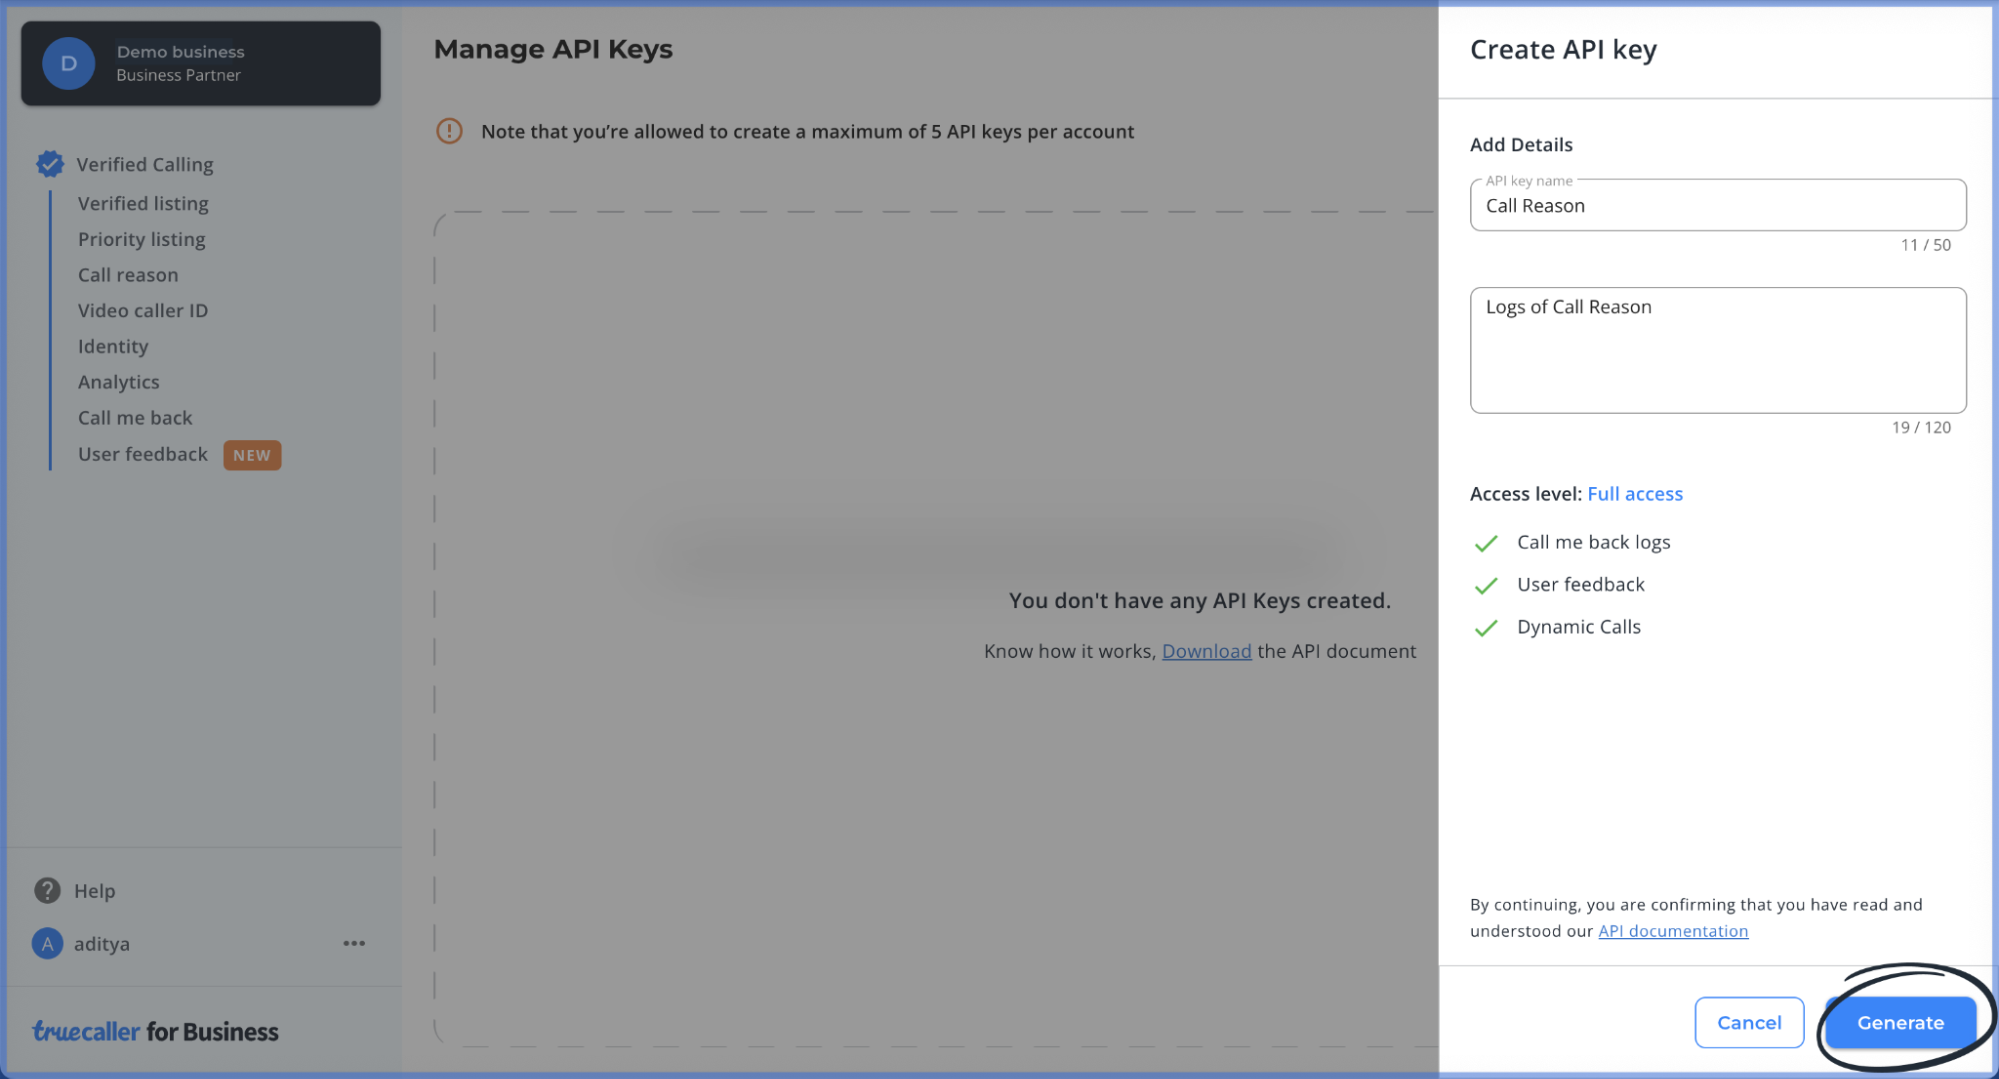
- Enter the Key Name, Description (optional) and view the access levels to the features.
- Clicking on “Generate” will take the user to the screen below which has the option to copy/save the Key ID & Secret API Key. (Important)
- This file should be downloaded and kept securely.
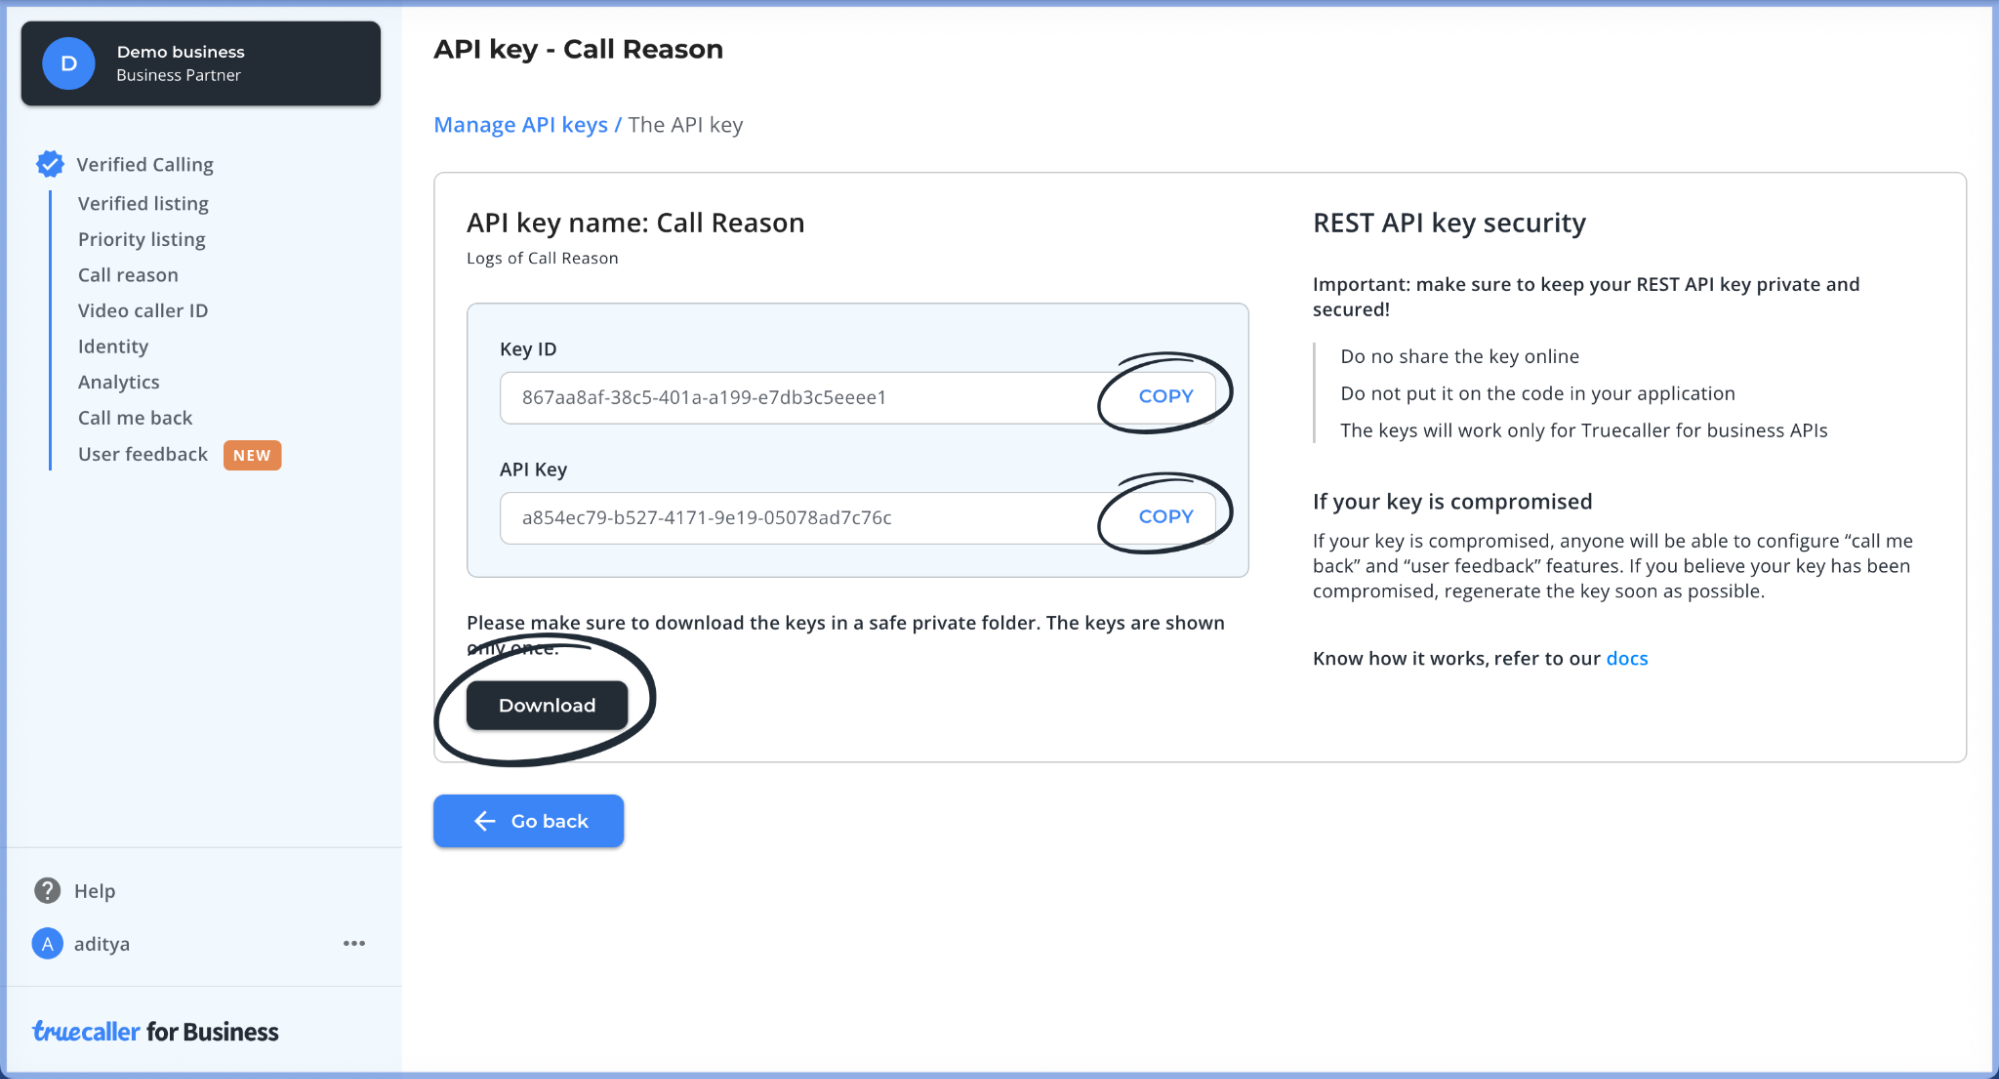
Note
This screen won’t be visible to the user again & hence it is advised
to download the secret API Key and Key ID.
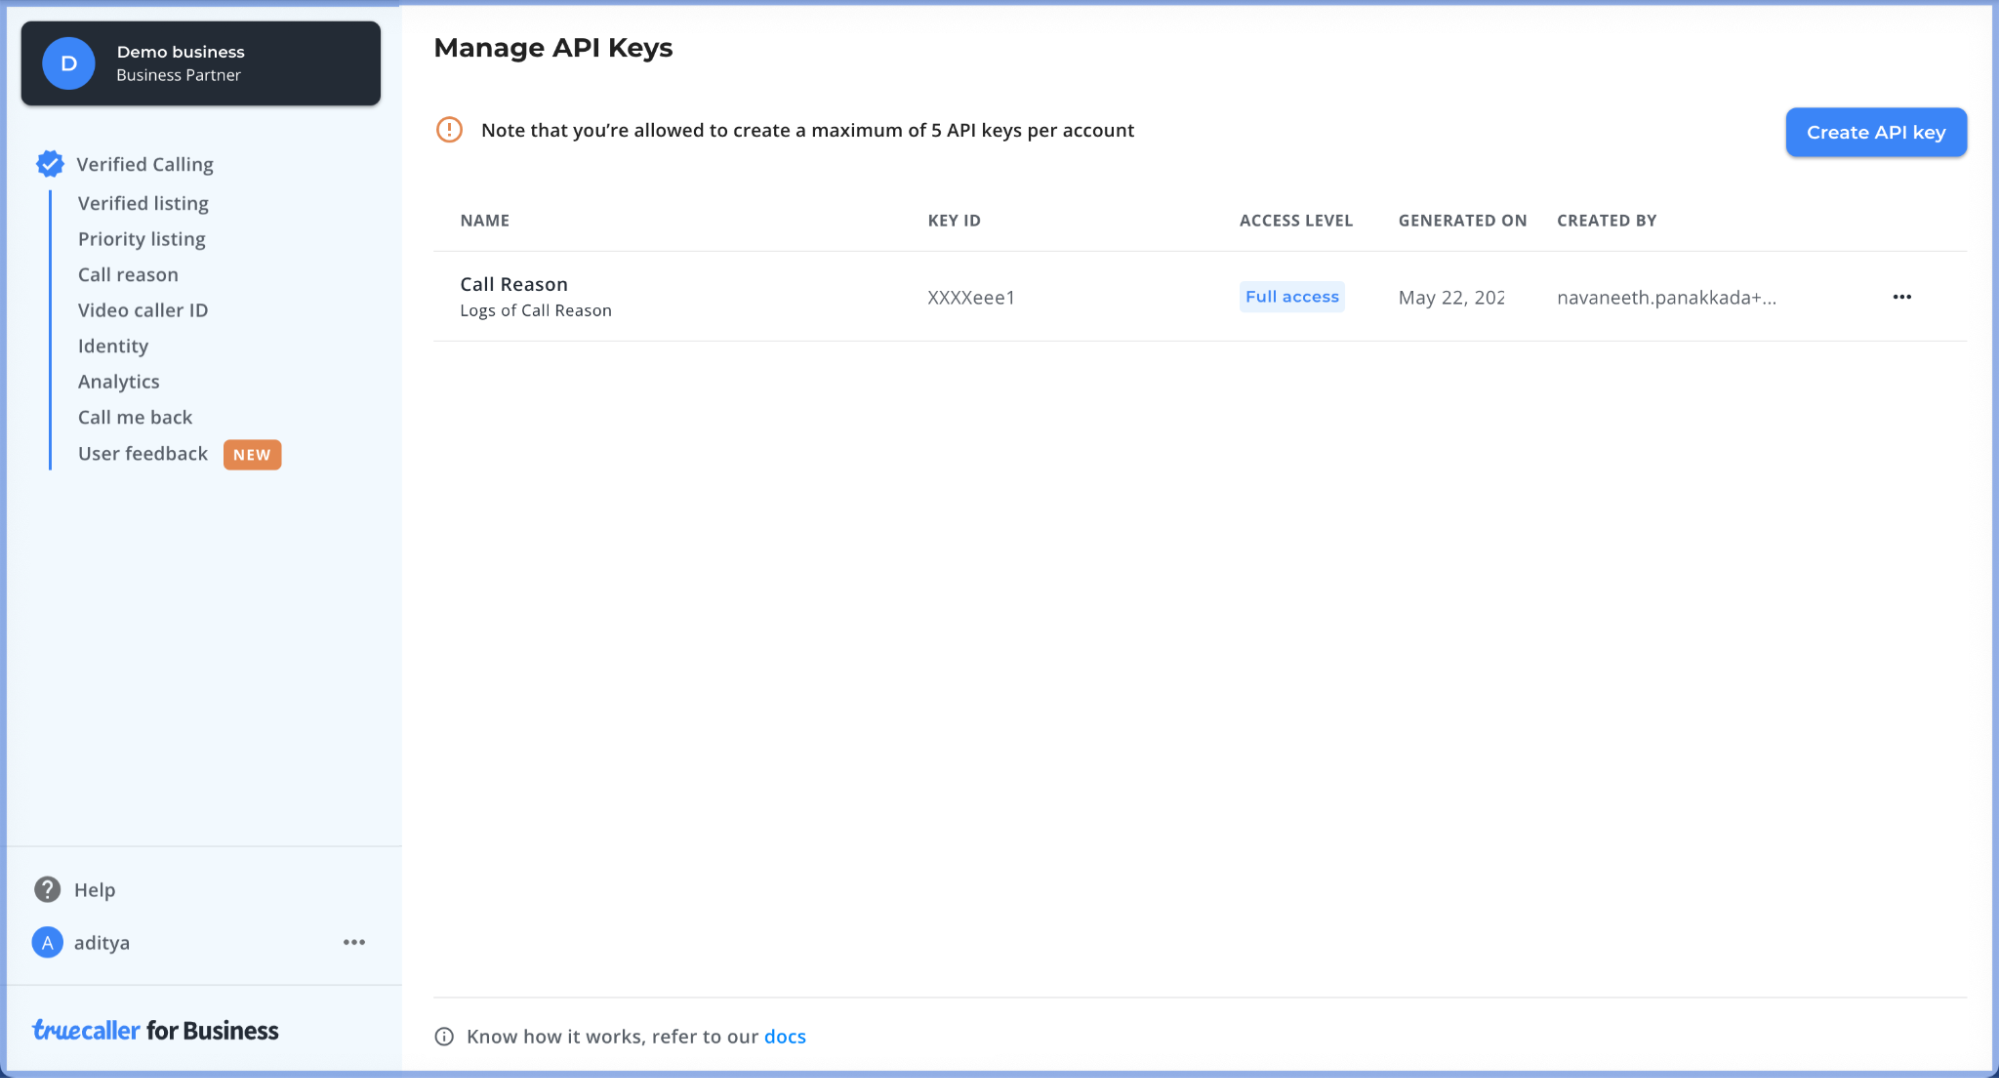
Manage API keys
- Clicking on Manage API Keys will show the list of API Keys generated by the client and its access levels. Users have the option to generate only 5 APIs keys per account at a time.
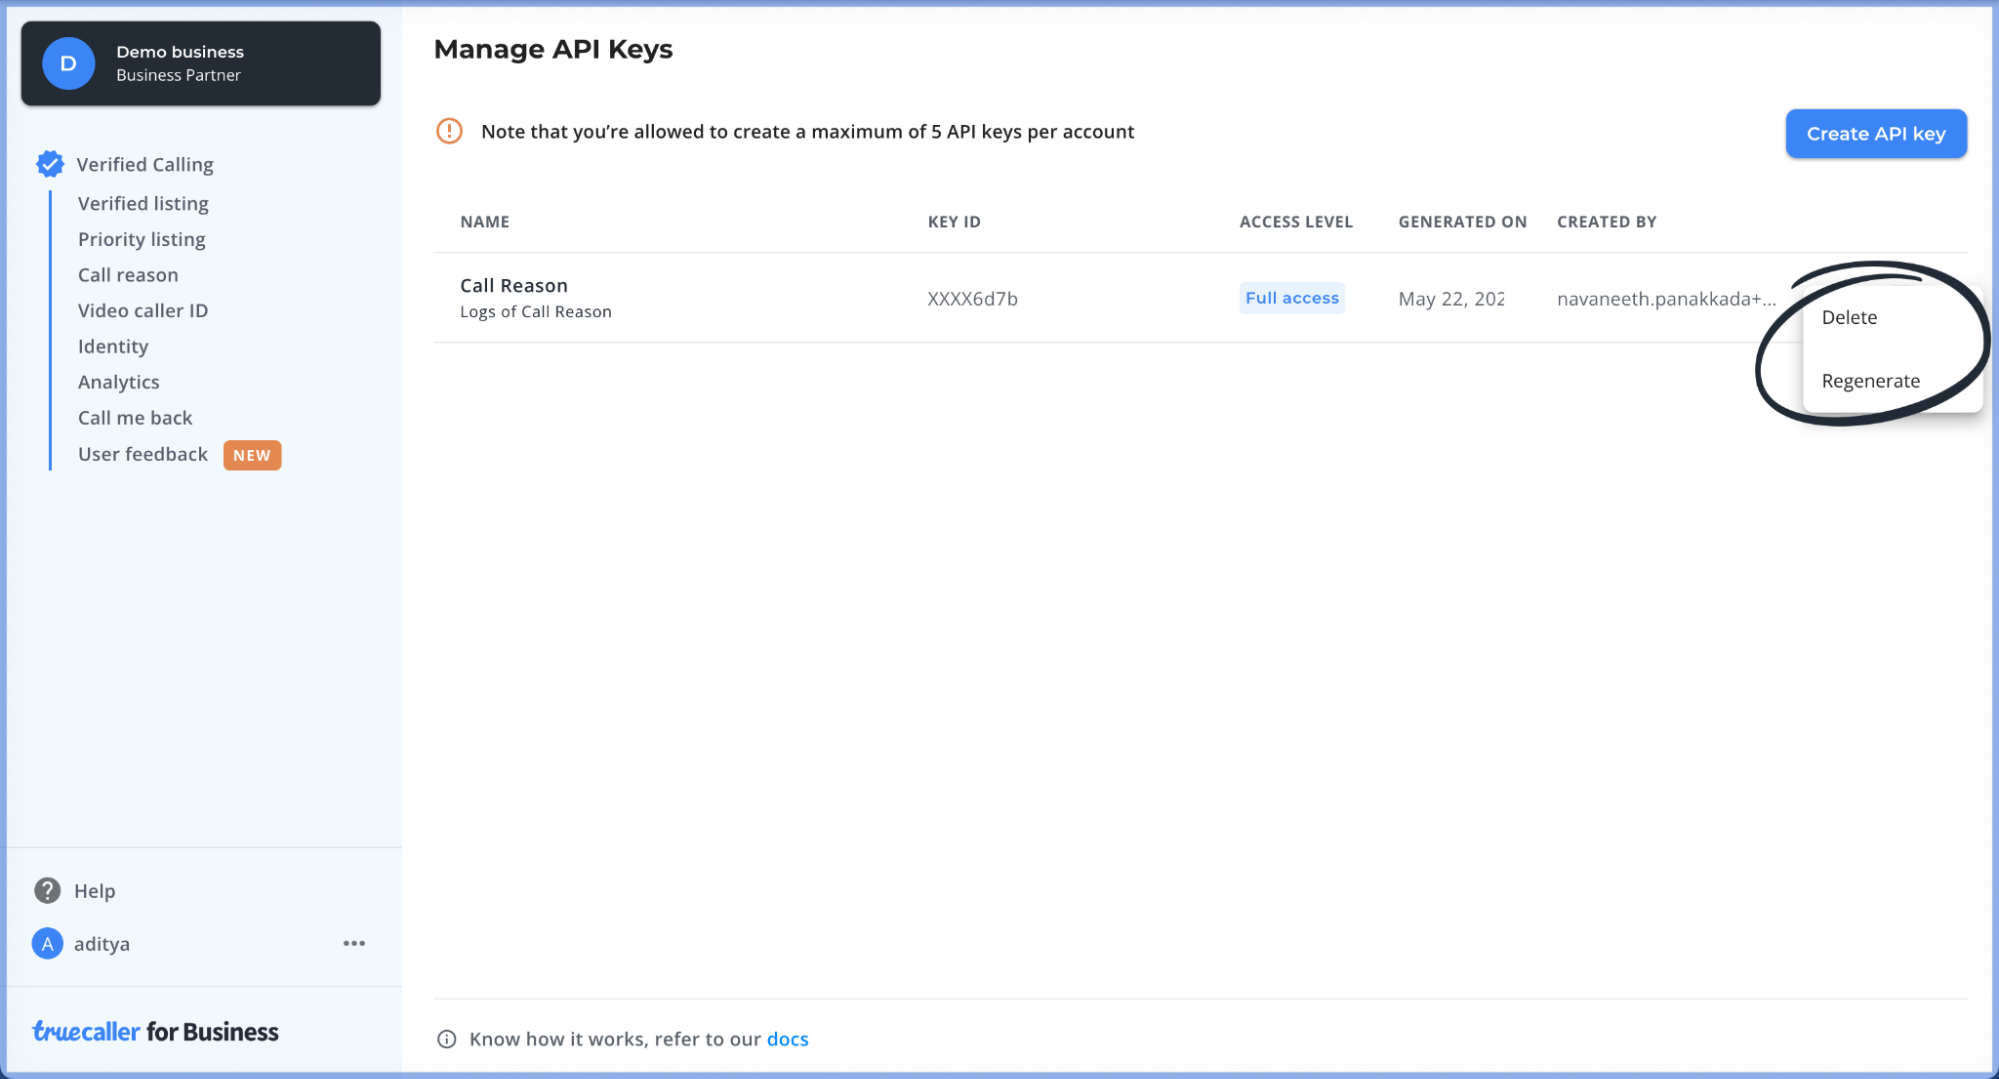
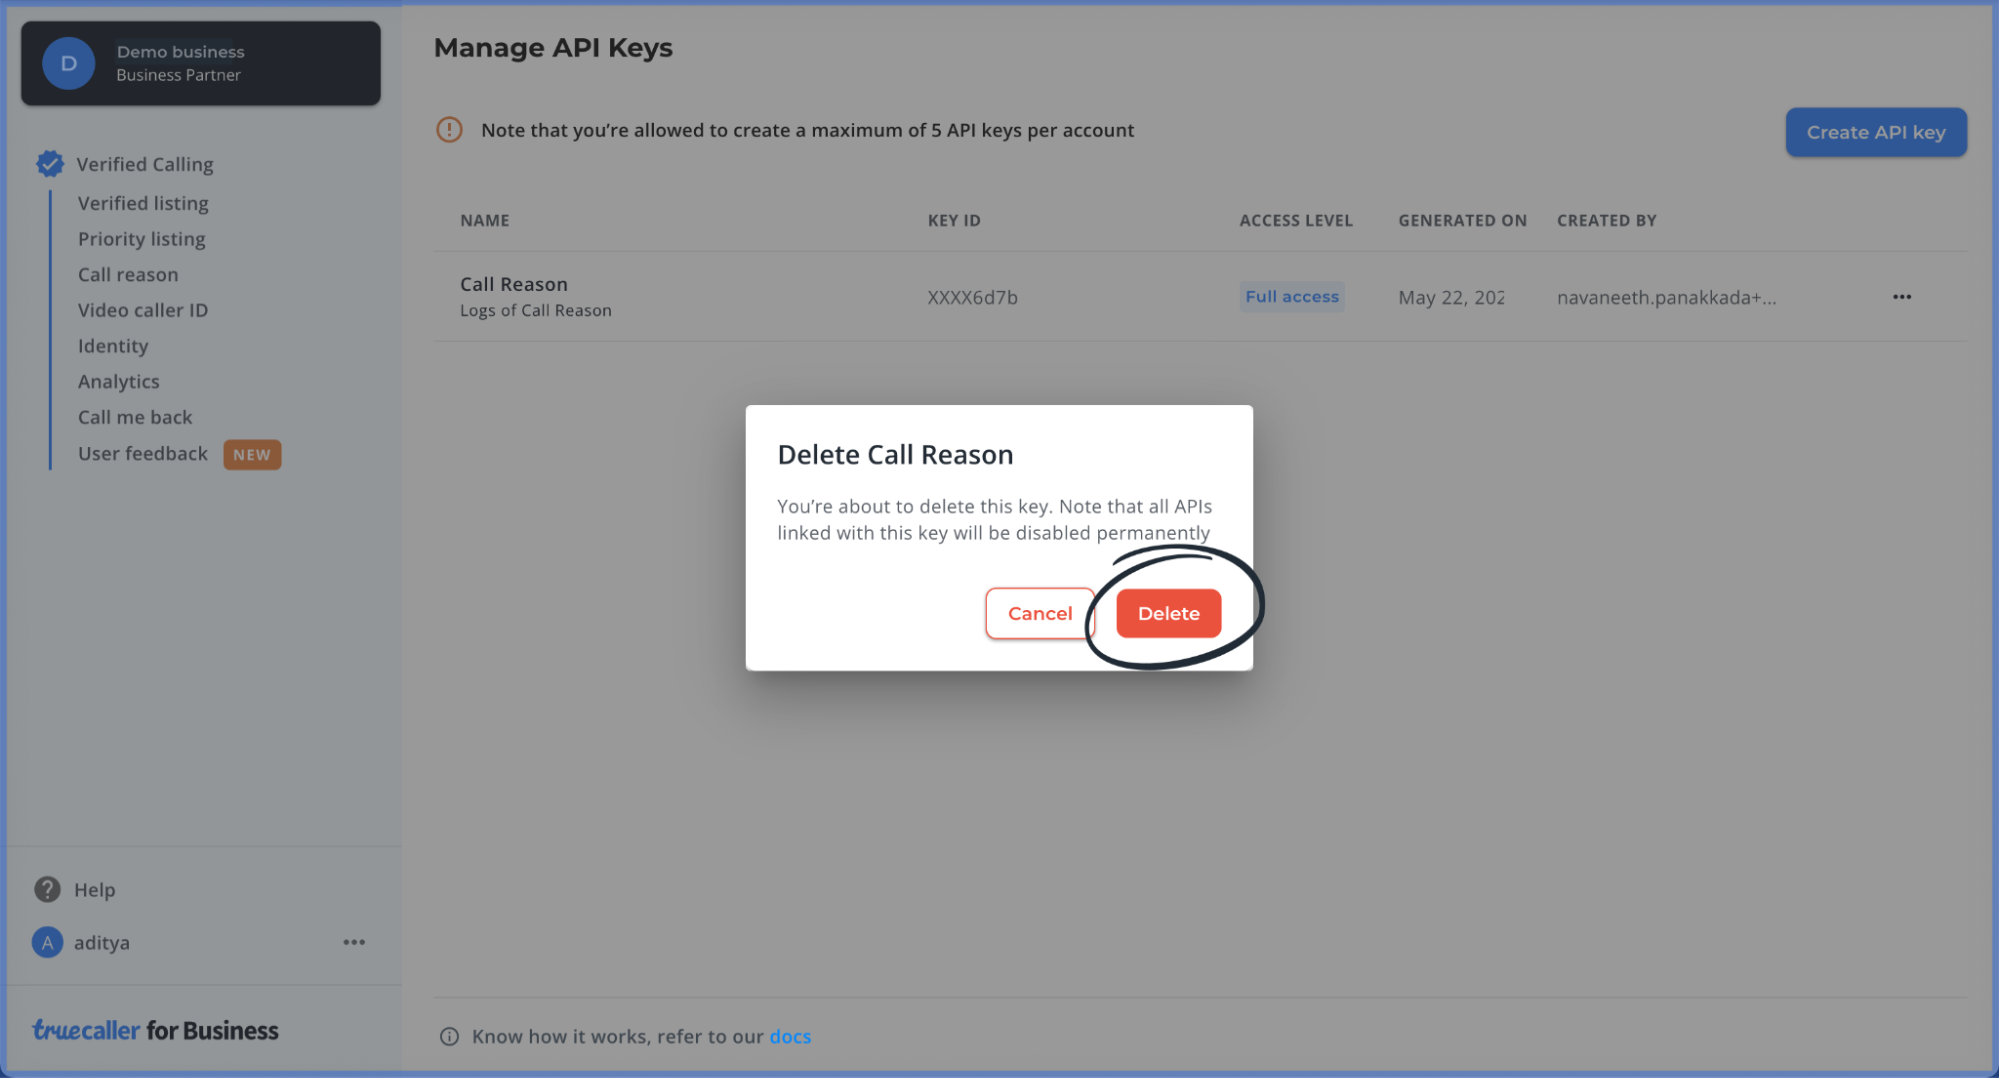
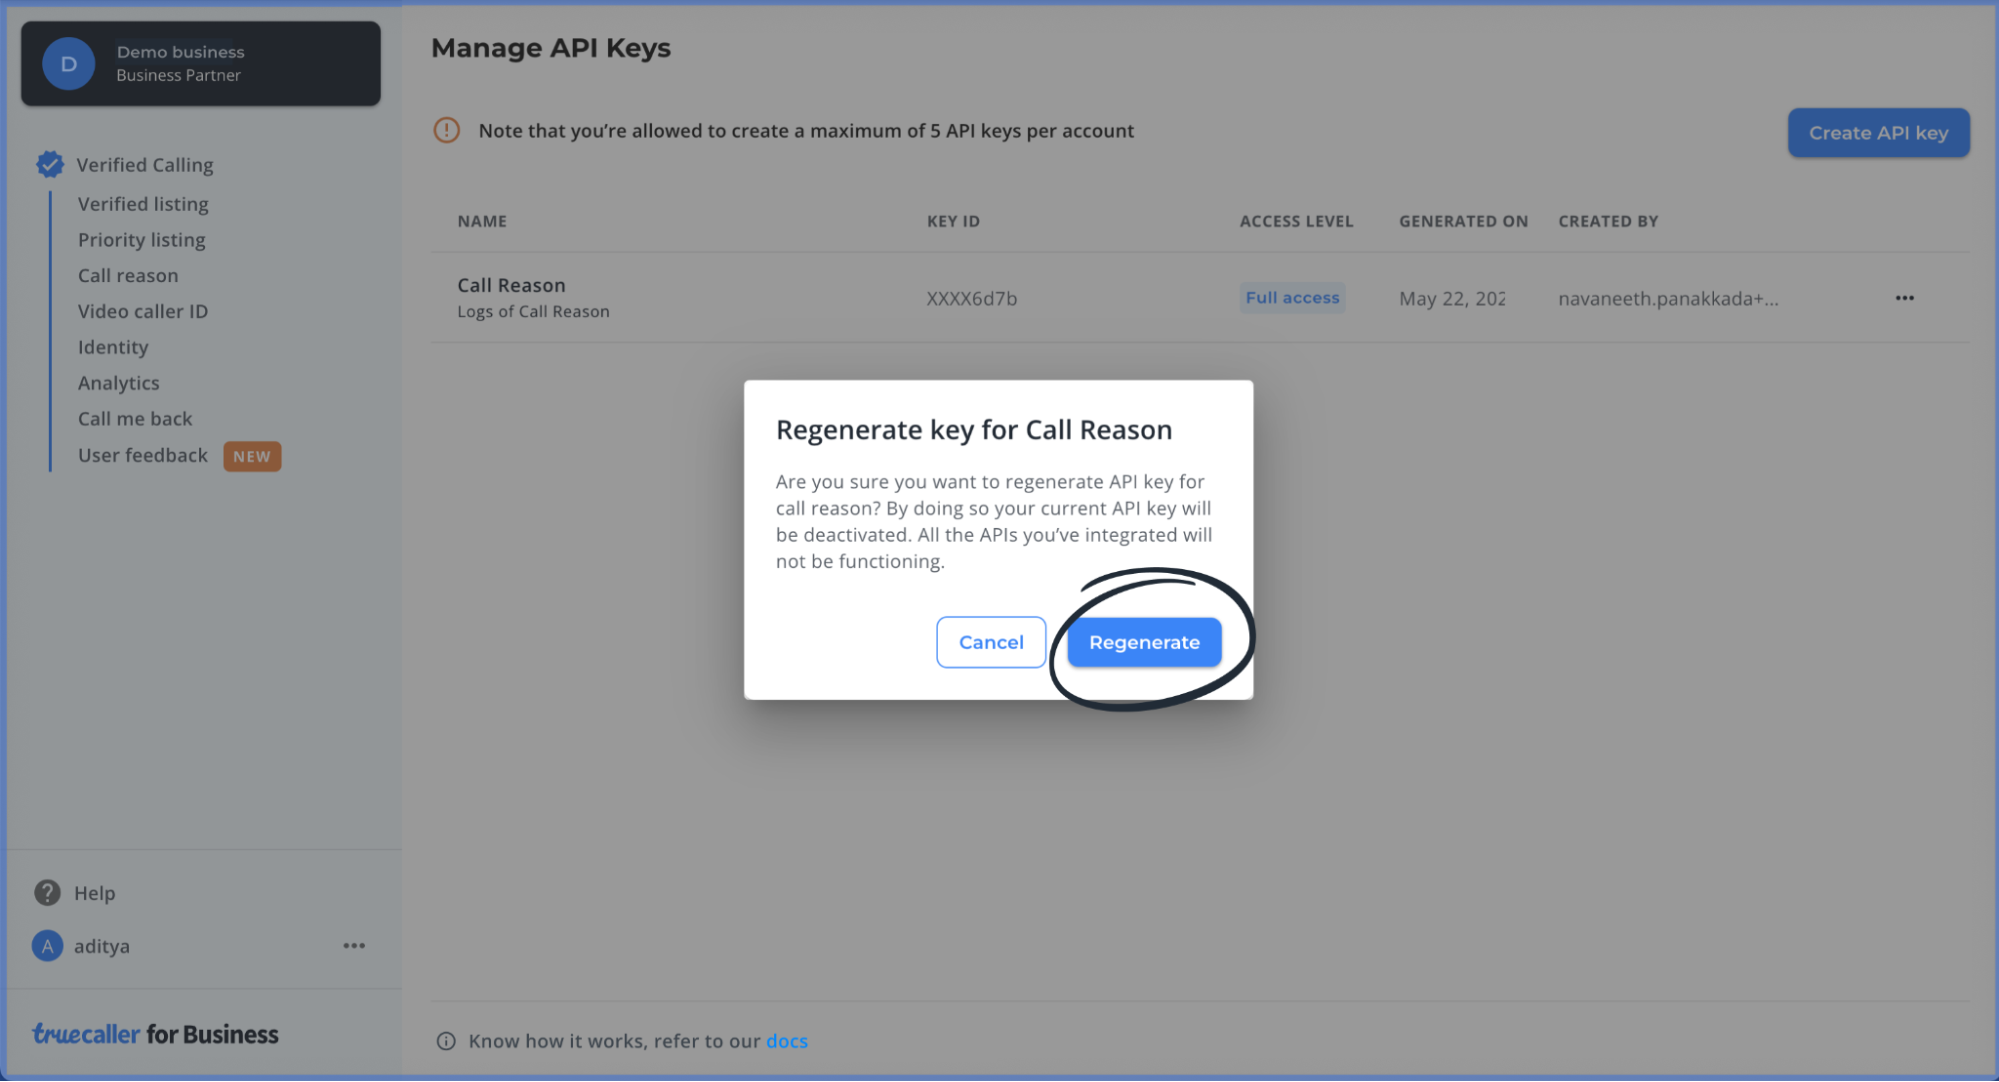
- Users will also have the option to Delete and Regenerate the API Keys.
Get a Token using the API key and KeyID
Note
This endpoint generates an enterprise access token with 1 hour expiry
time.
Webhooks
In order to notify your systems for events related to features in your enterprise plan, Webhooks (or HTTP callbacks) can be configured on the Self-serve platform.
Configure Webhooks
- To configure your webhooks, go to overflow menu as shown in the image below and click on manage webhooks.
- If you have not added a webhook, click on “Create Webhook” to add one.
Note
A total of 5 webhooks can be configured under a client account.
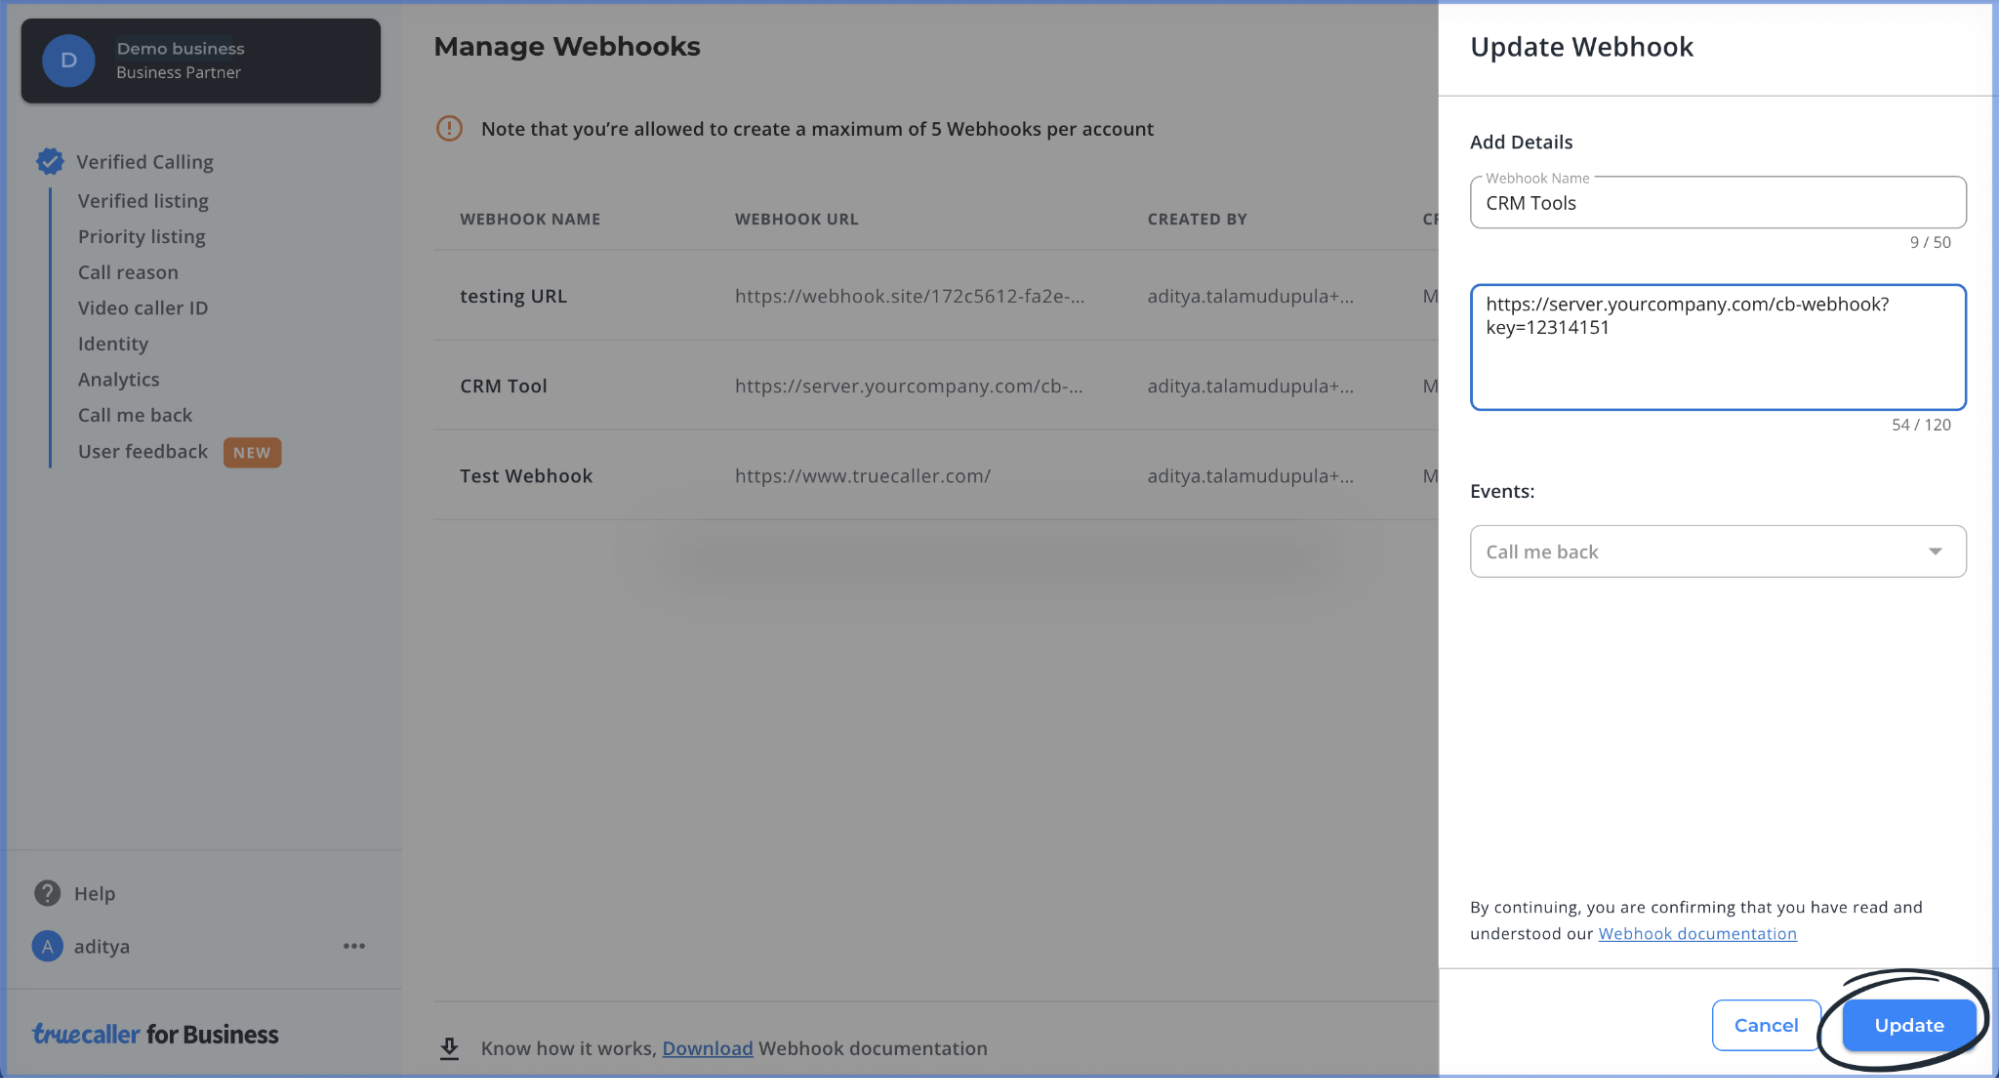
Webhook name and URL
The Webhook Name is the name by which the webhook will be referred to in the self-serve. The Webhook URL represents the endpoint to which the webhook should be sent.
One way of authenticating a webhook call is by including a key generated by you, as part of the webhook URL. For example, the URL could look like:
https://server.yourcompany.com/tcbiz-webhook?key=<yourkey>
Note
Webhook Name should be unique at a given time, i.e all the configured
webhooks should have a different name while being listed.

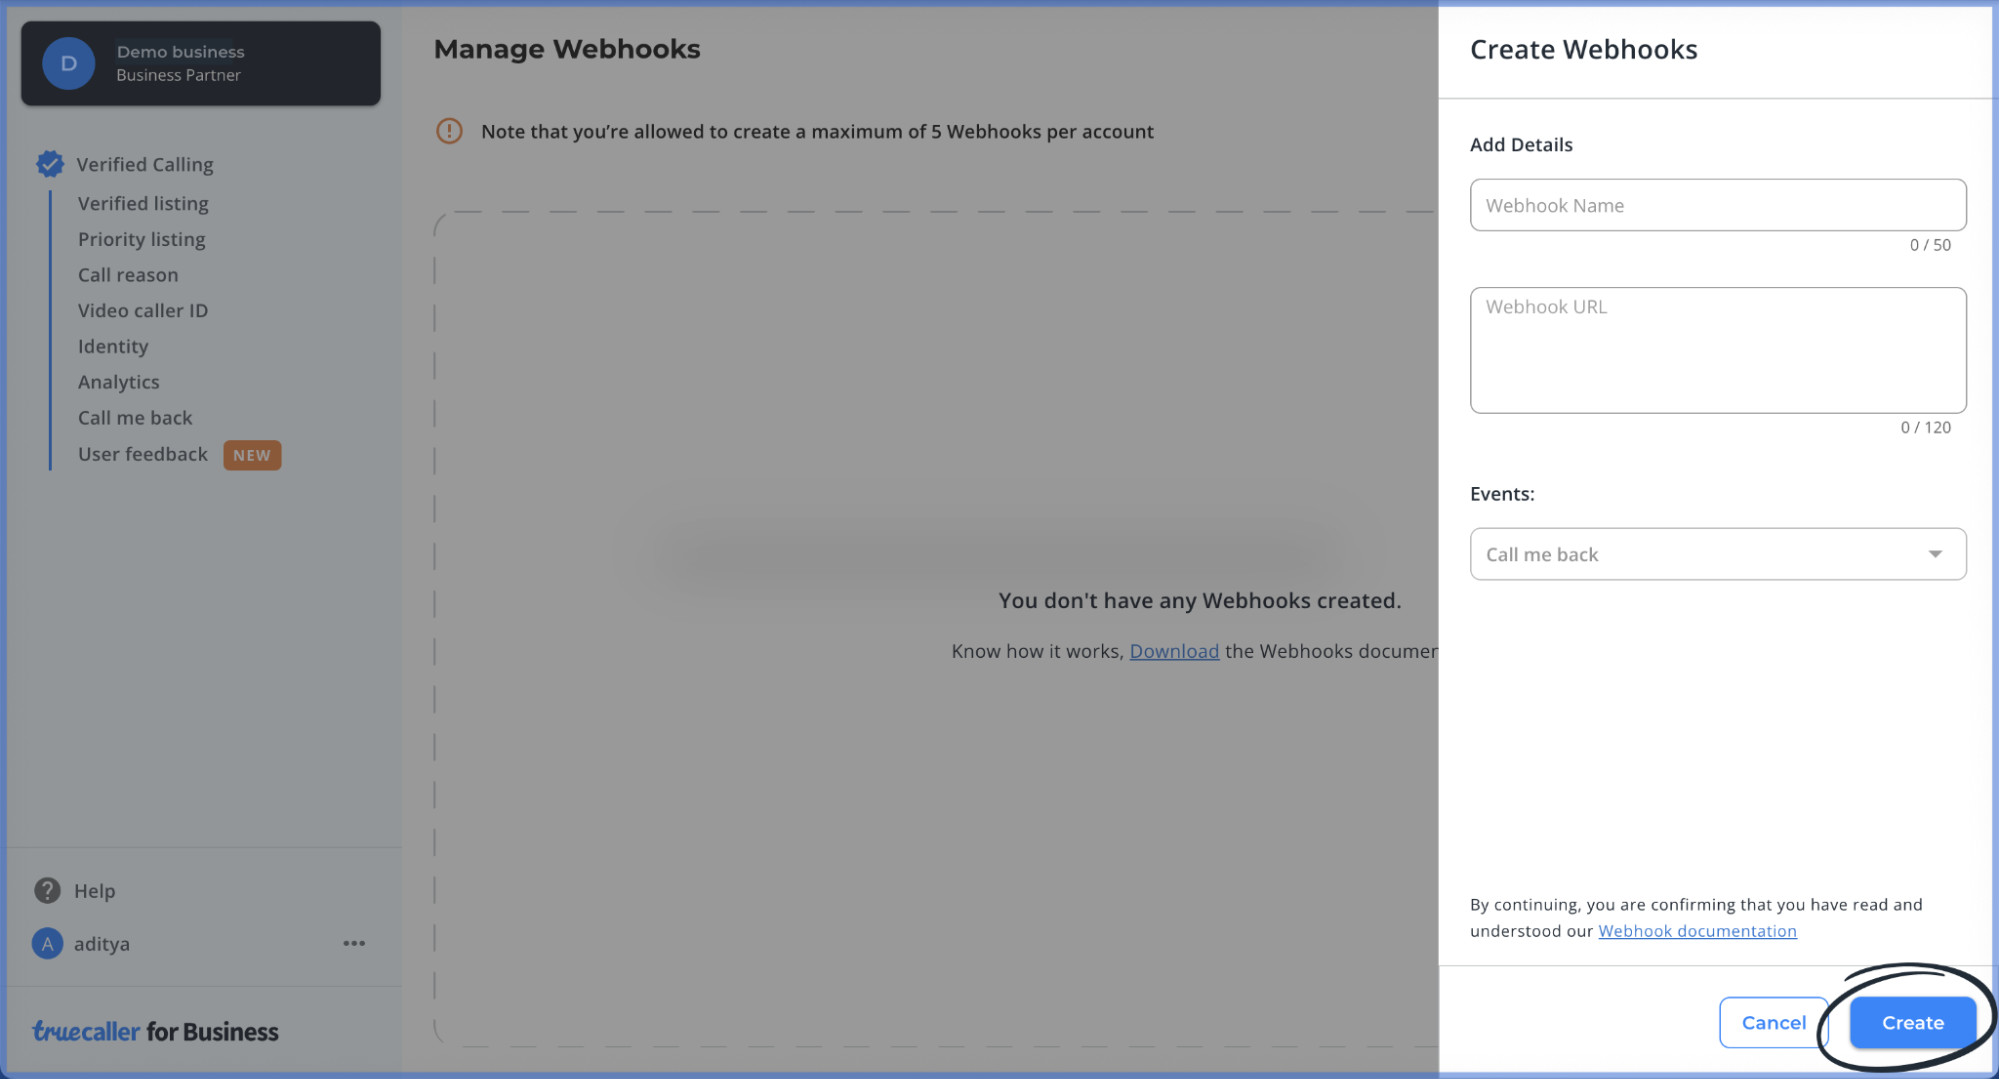
Webhook Events
Whenever there's a response to the enabled features you've set up with a webhook, we'll catch it as an event. Right now, we're all set to capture Call Me Back and User Feedback events. A webhook can be attached to one or both of the call me back and user feedback events
Event logs for your webhooks can be found from
- Manage Webhooks page
- Webhook events page
Details of events related to the webhook can be found in the event details page.
Note
Events are shown for the period of last 30 days.
Event Types
We support Call Me Back and User Feedback event. Each event has its resources that can be referred from the Resource column
| Event | Trigger | Resources |
|---|---|---|
| Call me back | When a user requests a call me back from the Truecaller App in the scenario of a missed / rejected call |
|
| User Feedback | When a user responds to a campaign based on the type of call, answered or missed / rejected. This response is from the campaign on the Truecaller app. |
|
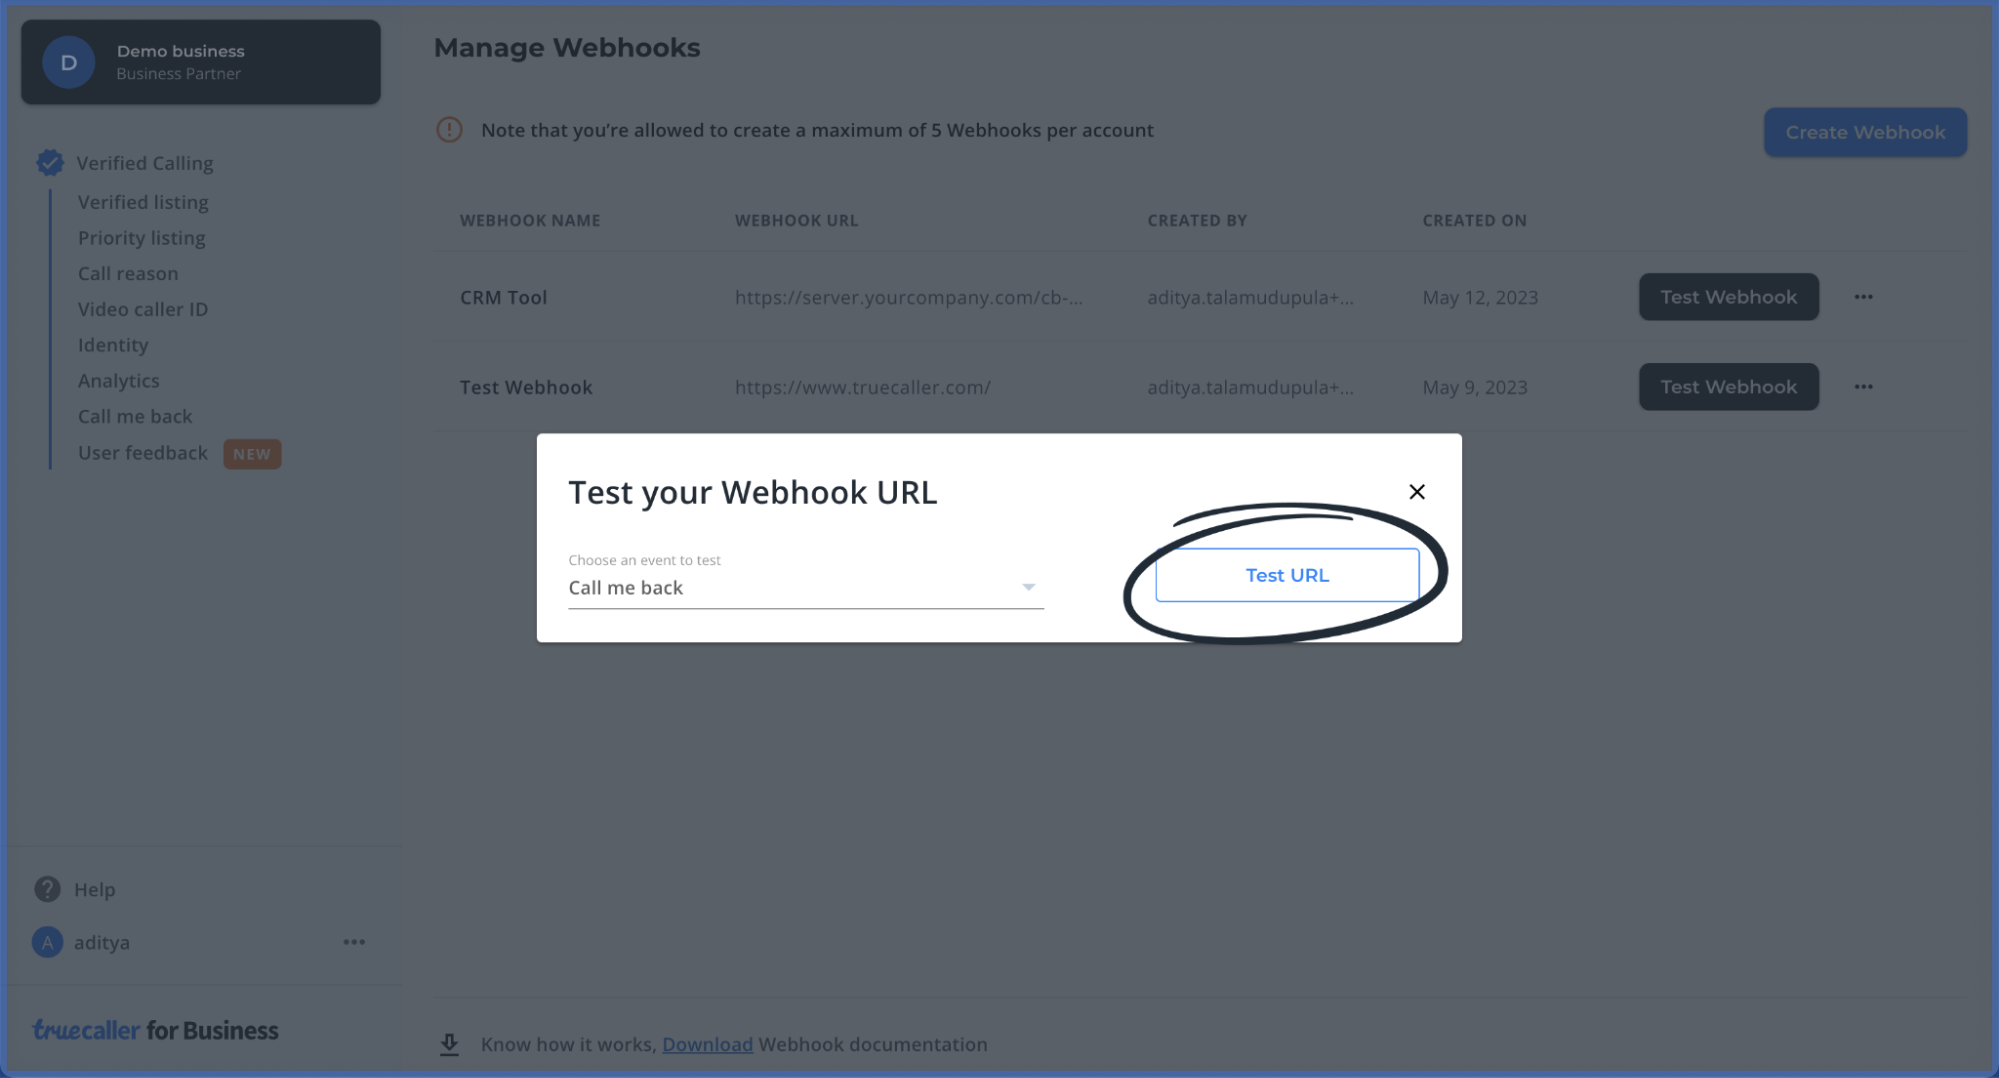
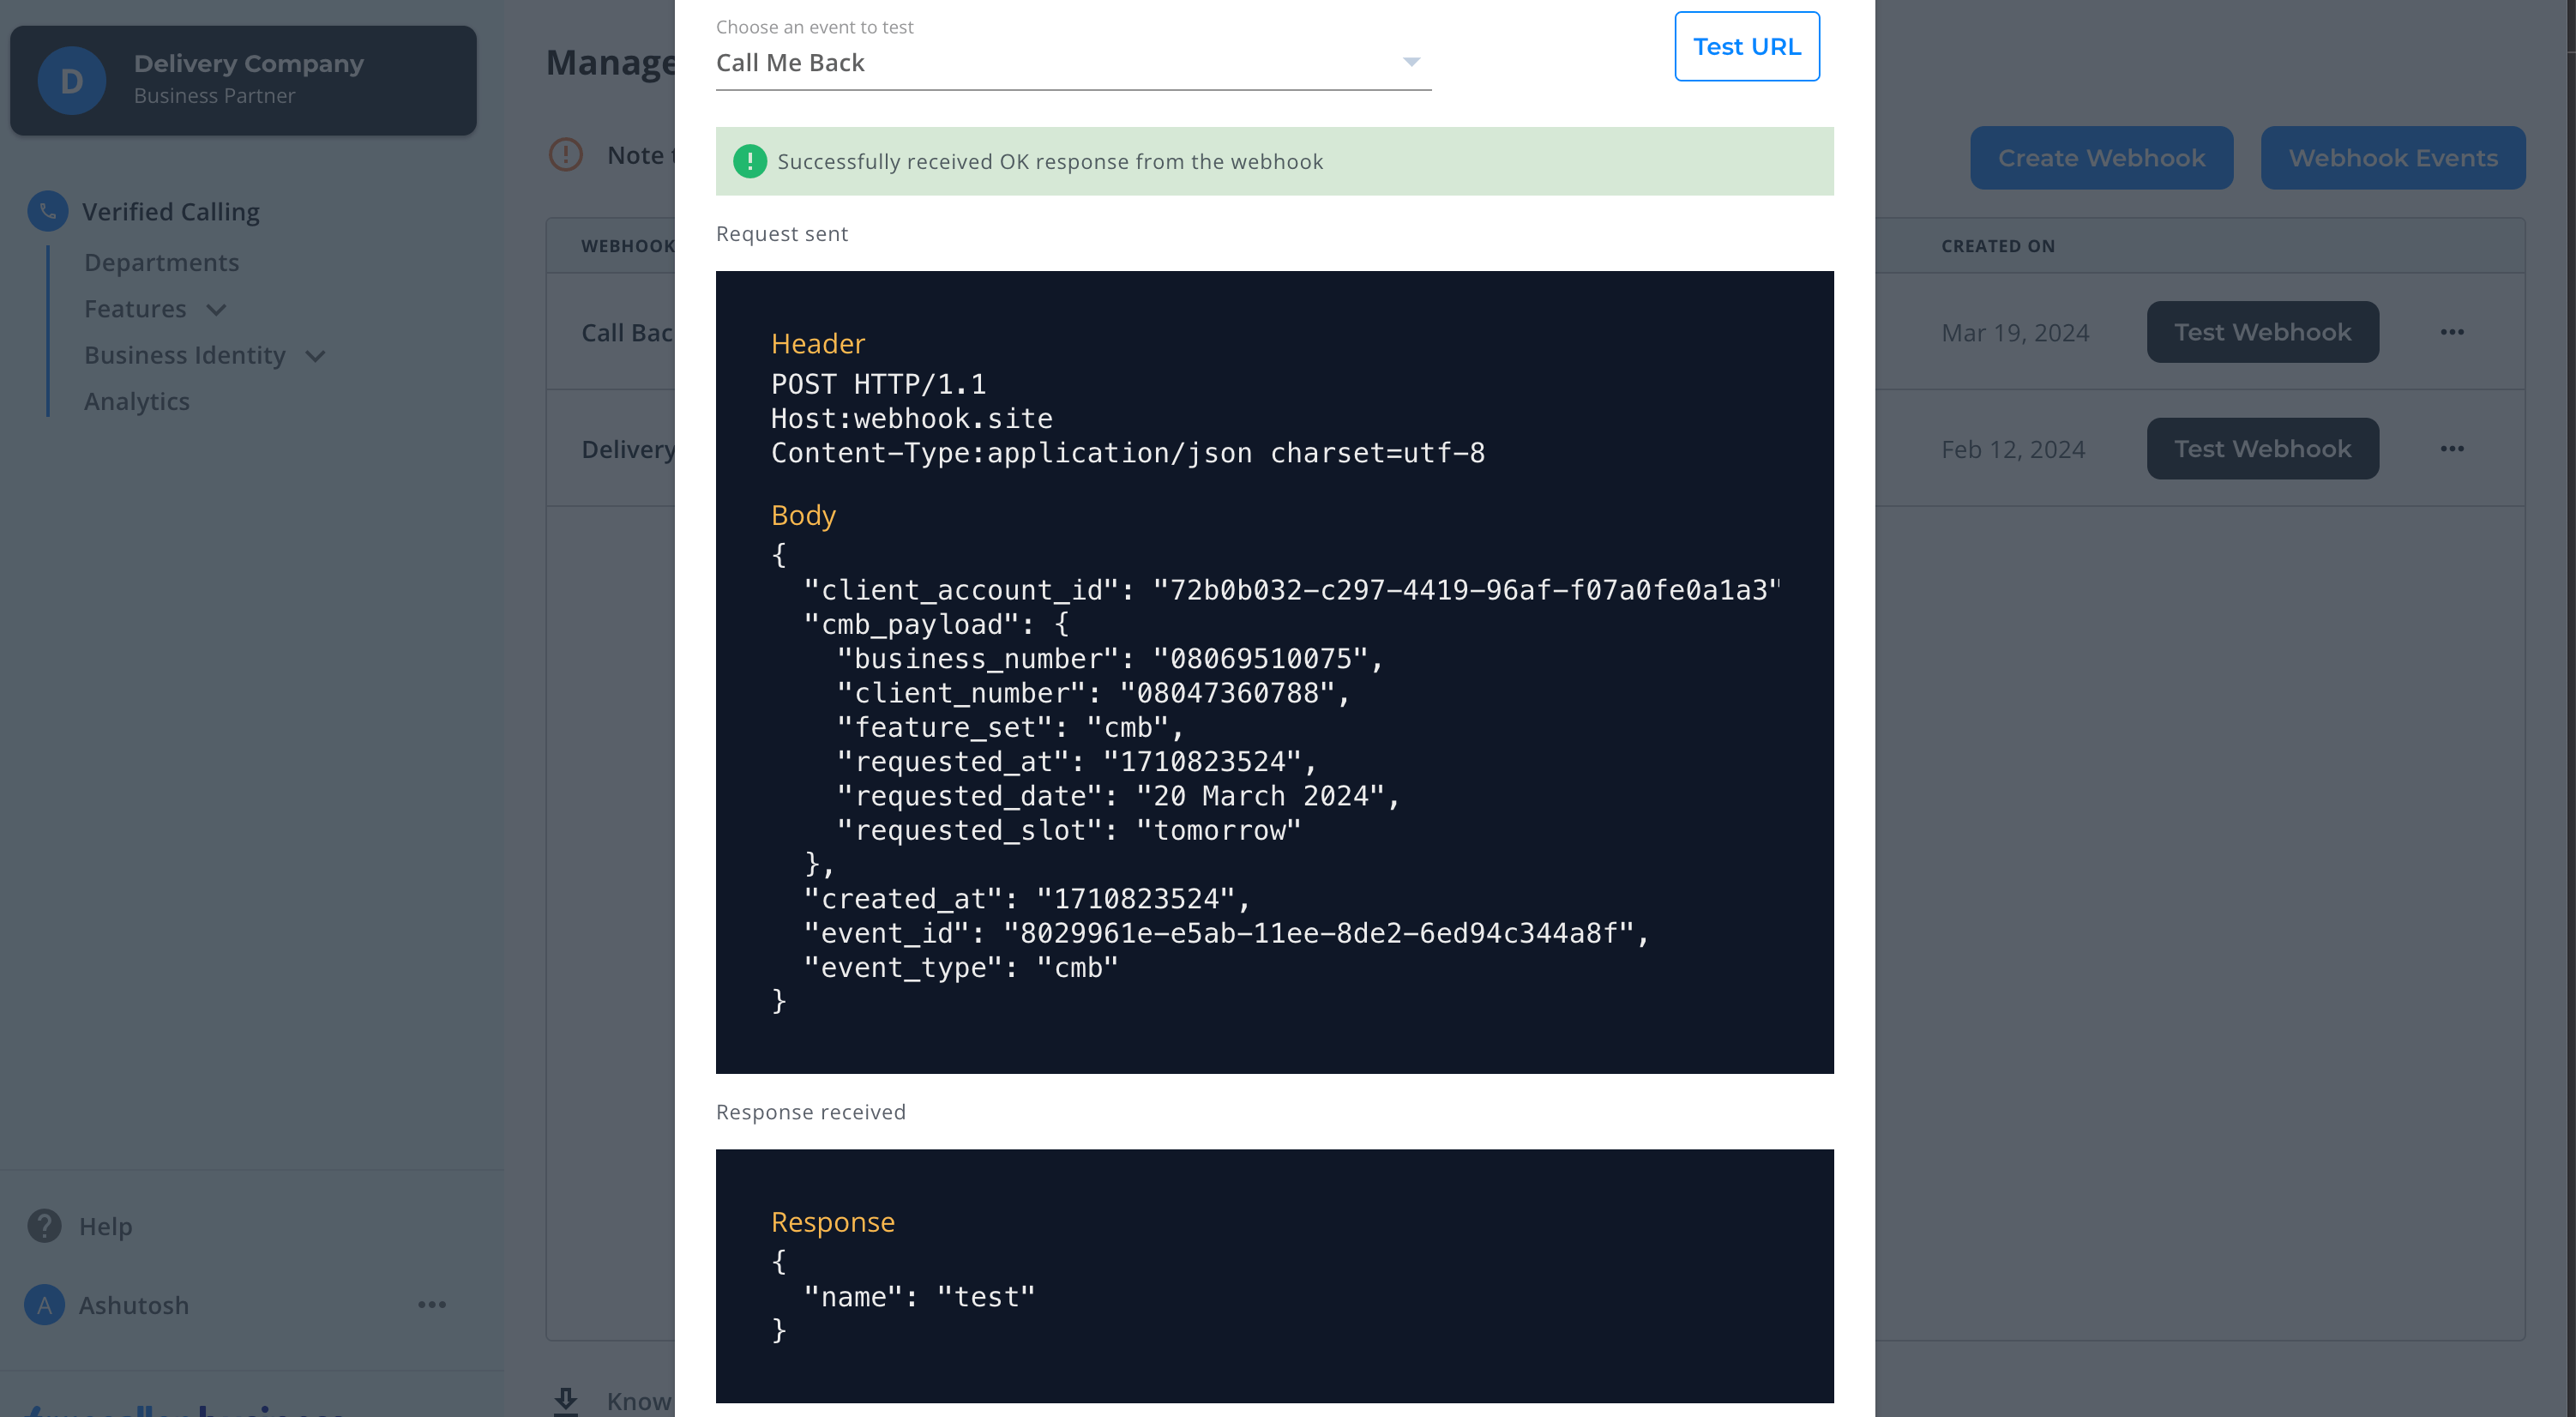
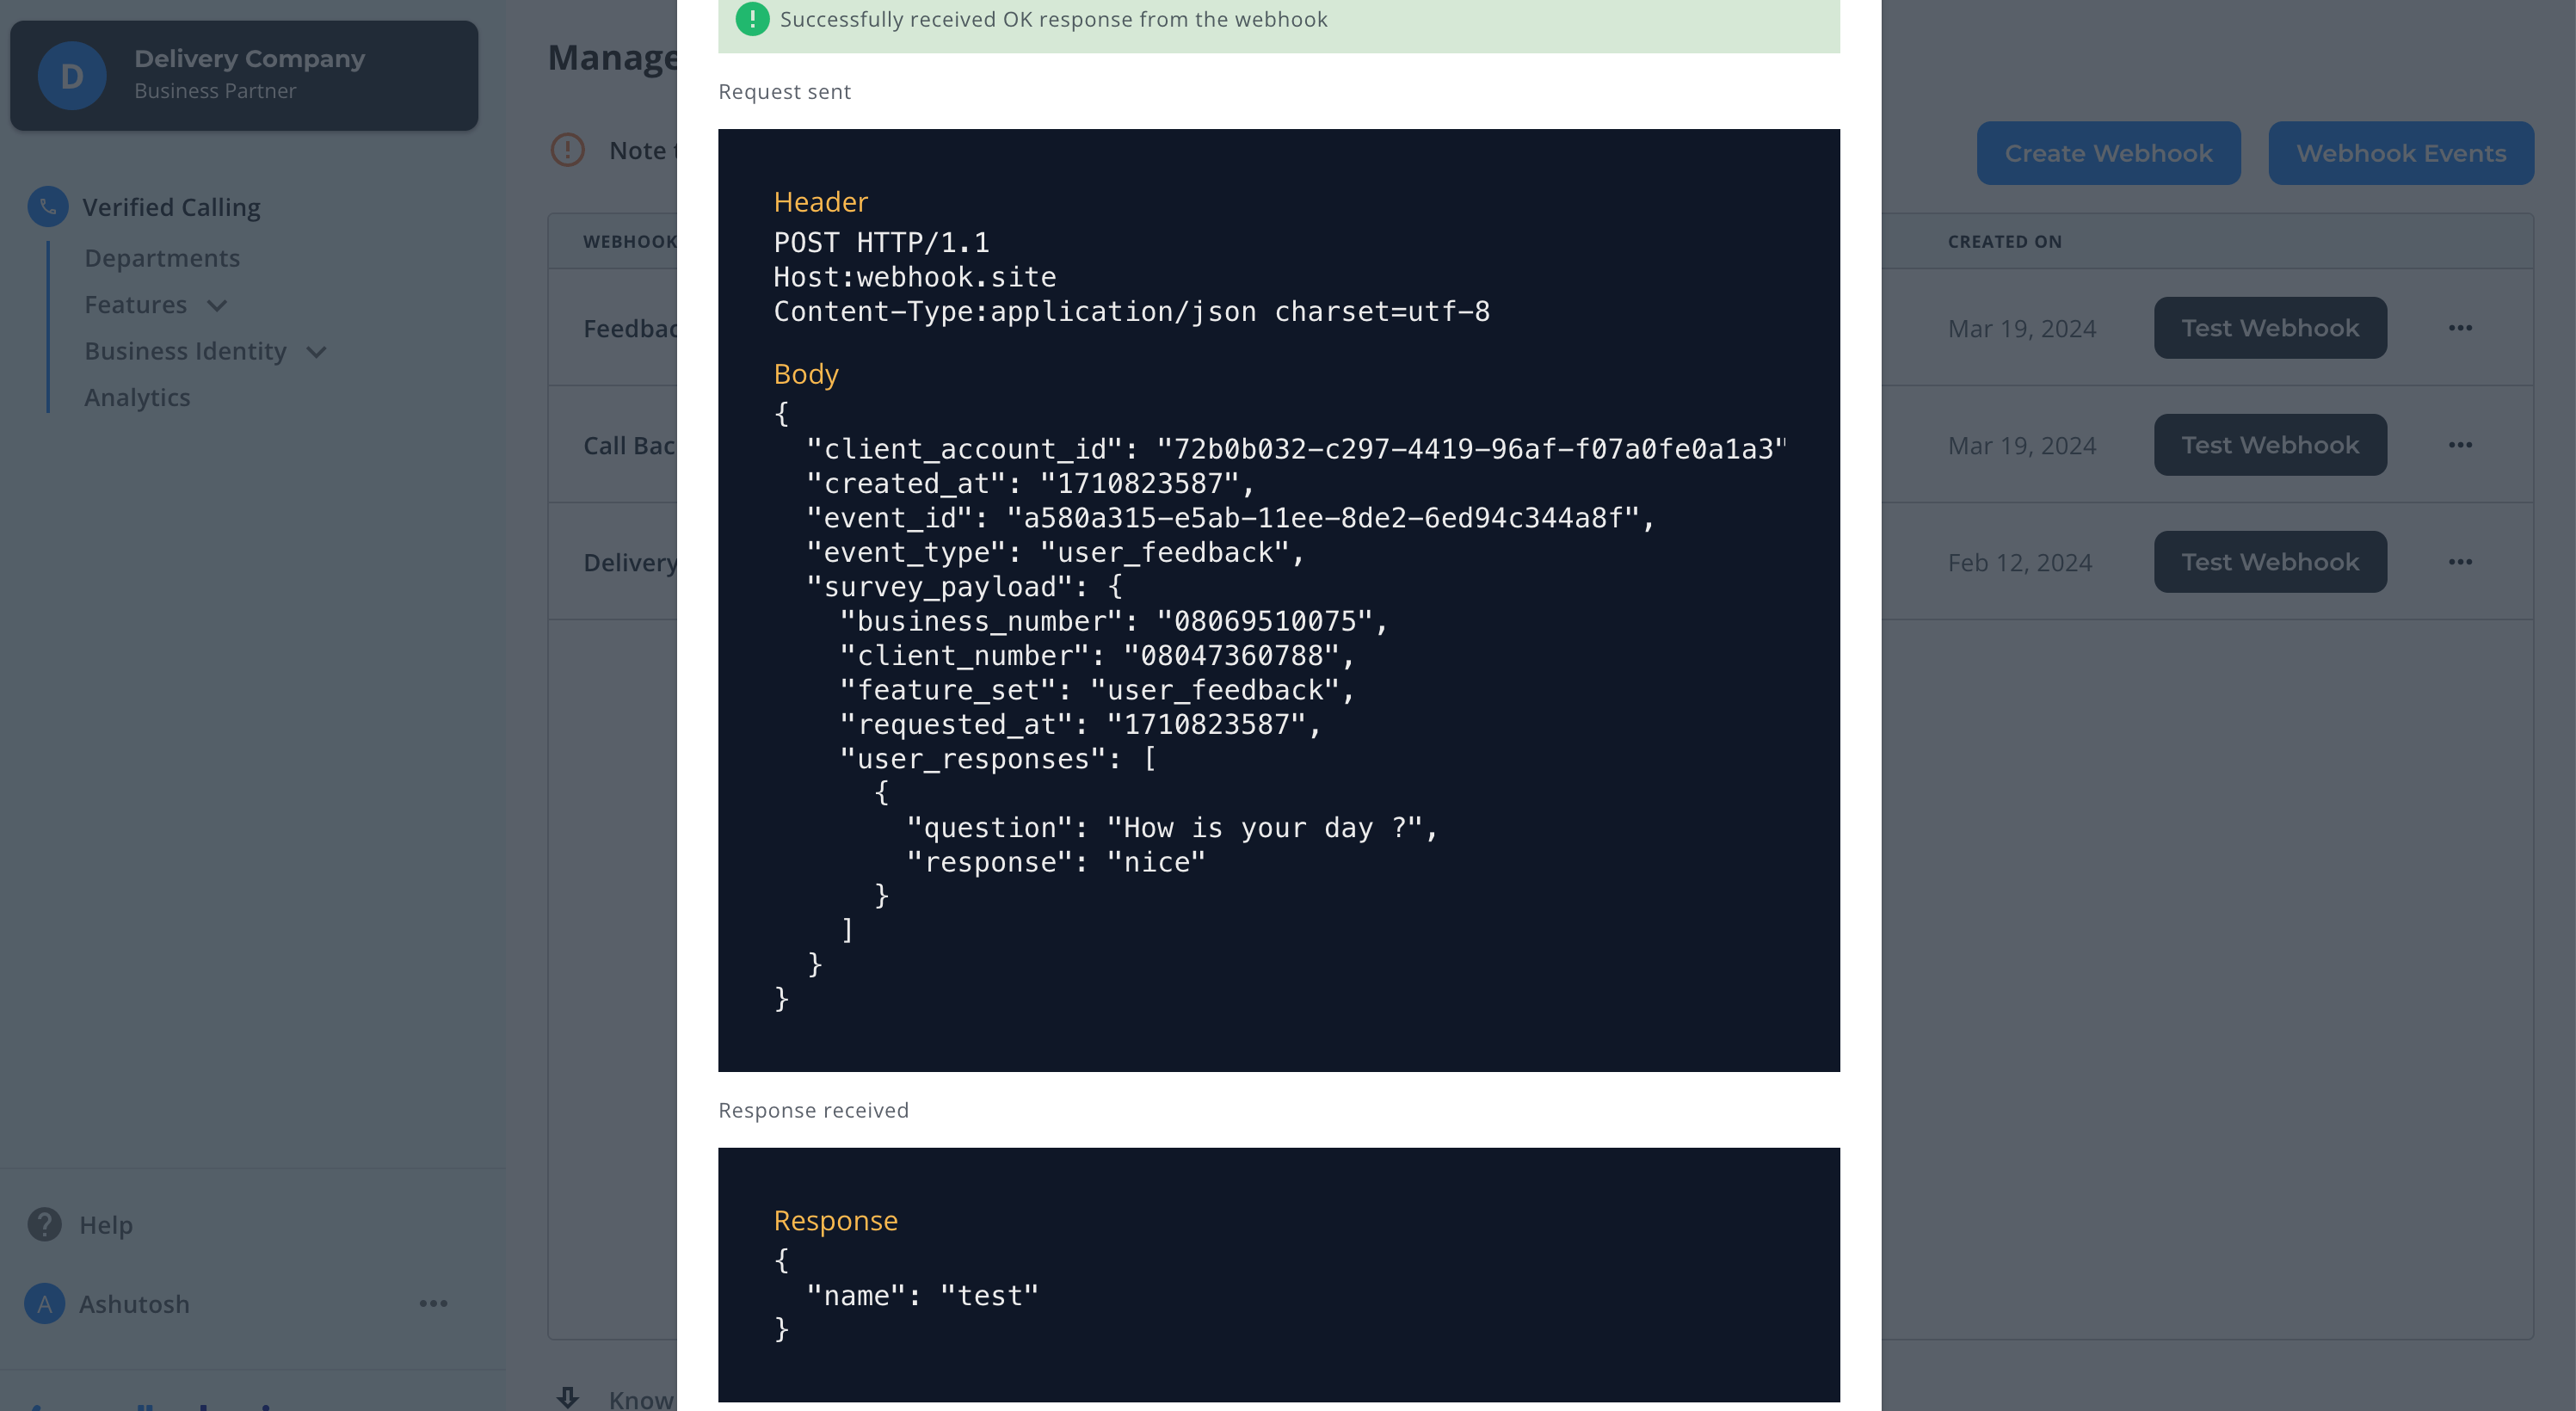
Test Webhook
A webhook can only be tested after it is created. Mentioned below are the steps to test a Webhook.
- Click on Test Webhook
- Choose the event to test (current default selection is call me back)
- Click on Test URL
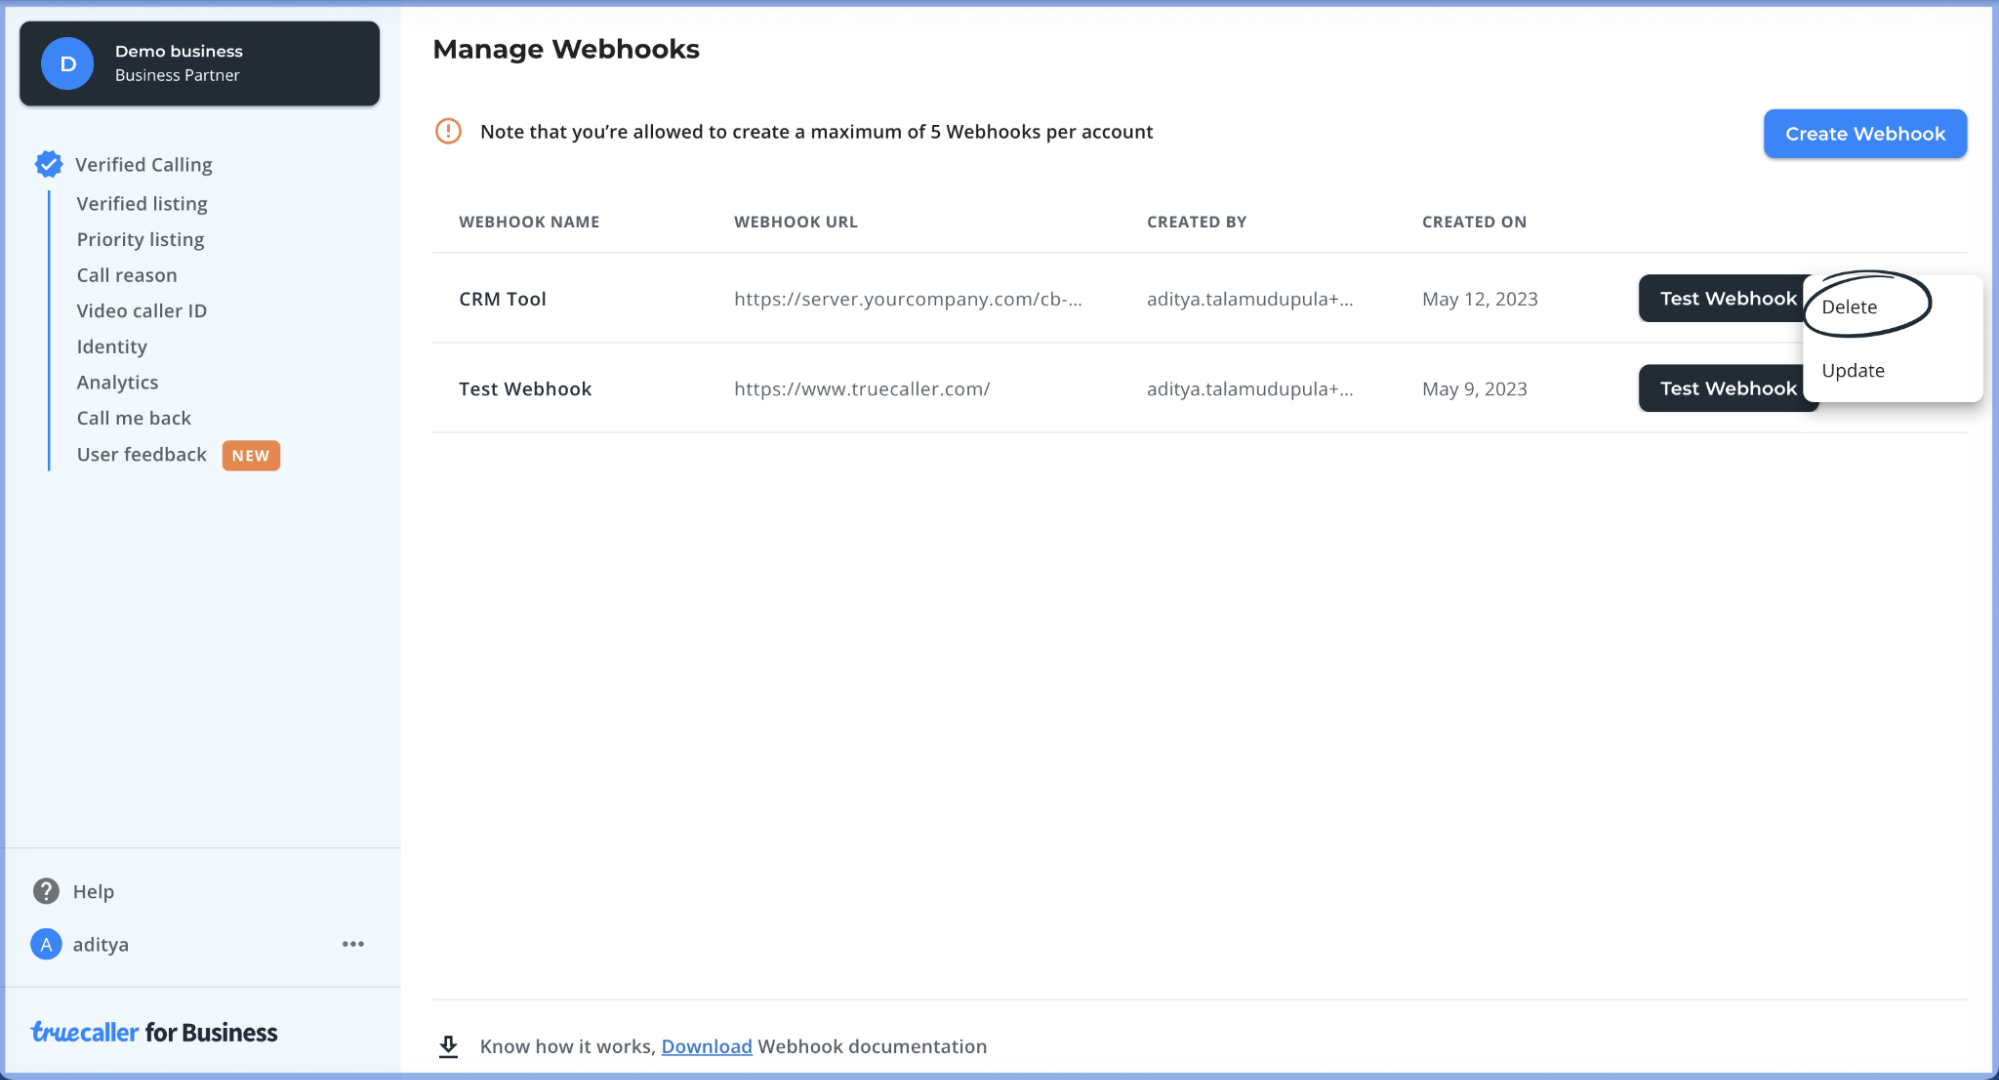
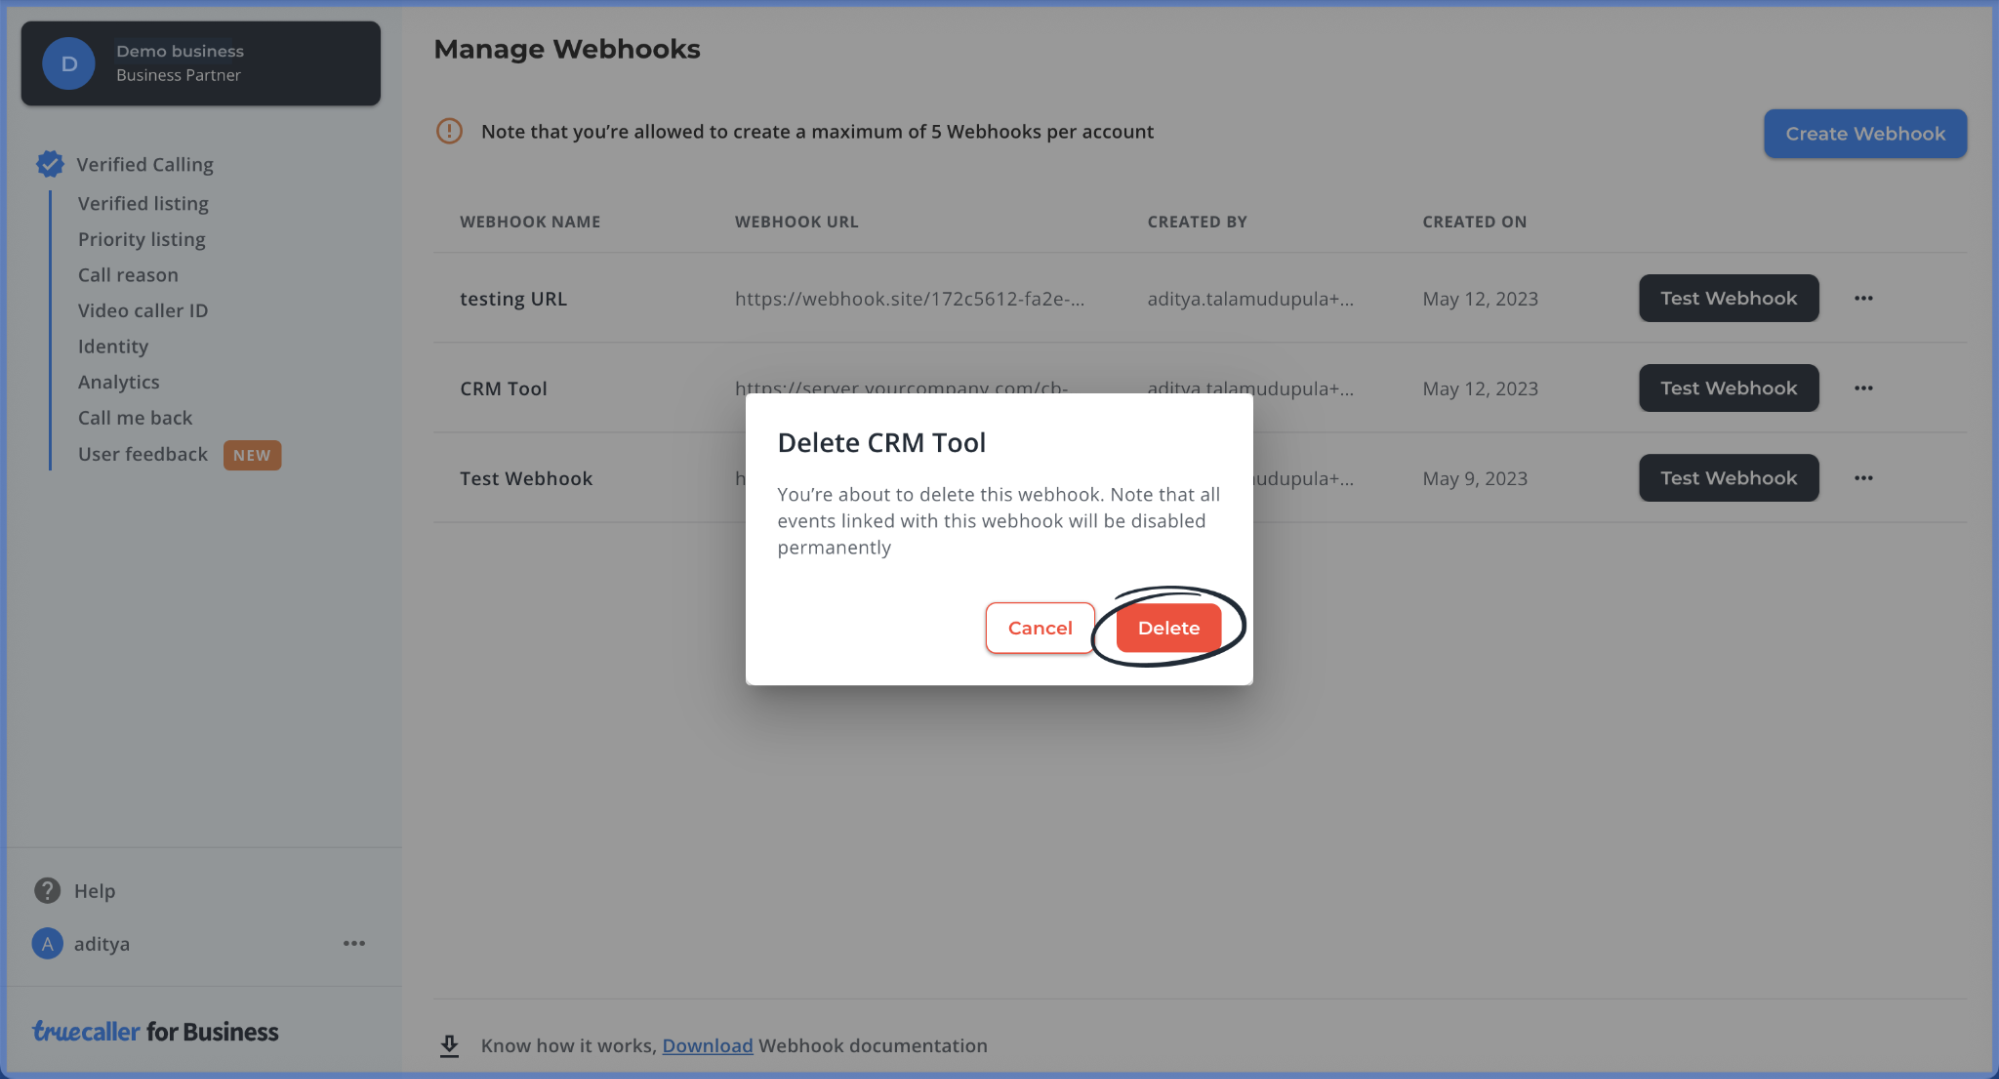
Update or Remove Webhooks
To change a webhook’s configuration or to delete it, click on the overflow menu beside the Test webhook button (image attached for reference).

Webhook Timeouts
There are 3 timeouts for Webhooks provided by Truecaller for Business:
- Connection Timeout: The connection timeout is the timeout for making the initial connection to the webhook URL's HTTP server.
- Read Timeout: Once the initial connection has been made, at any time there is a possibility that there is an indefinite wait to read data from the HTTP server. The read timeout is the timeout for such a wait.
- Total Webhook Timeout: In addition to the above timeouts, TC for Business also checks the total execution of time of any webhook call via the webhook execution timeout.
The values for each timeout are as follows:
| Timeout | Duration |
|---|---|
| Connection Timeout | 20,000 ms |
| Read Timeout | 20,000 ms |
| Webhook Execution Timeout | 60,000 ms |
Automatic Retries
Webhook execution can fail due to timeouts or errors. For each event whose webhook call fails, the calls are retried up to 7 times based on the following schedules:
| Retry | Time |
|---|---|
| 1 | 2 minutes after the failure |
| 2 | 6 minutes after the previous retry |
| 3 | 30 minutes after the previous retry |
| 4 | 1 hour after the previous retry |
| 5 | 5 hours after the previous retry |
| 6 | 1 day after the previous retry |
| 7 | 2 days after the previous retry |
This is mentioned in the event details page
Error scenarios
Below are the error scenarios for webhook
- Webhook not found
-
Events
- Rescheduled error
- Webhook Deleted
- Webhook Failed - When webhook fails an email is sent to the user.
Call Management APIs
Use-case for Calling Management APIs
- Calling operations being done through non-company owned numbers where a permanent identity cannot be listed.
- Scheduled calling operations run daily & your business wants to add clean identity & context to those calls as well for optimal performance.
- Calls are often made from one business number to multiple users.
For using Call Management APIs, the following fields are needed to be passed in the API request,
- Caller (Initiator number) & receiver numbers
- Dynamic label ID
- Start & end time
- Call reason (Optional)
- Label Name (Optional)
Sample API requests with steps to place API triggered call has been explained in the sections below.
Note
- Max 500 requests can be processed in one go.
- Label name and Call Reason are optional.
Pre-requisites
- Subscription to Truecaller for Business Dynamic Calling.
- Dynamic Label ID: Only “Dynamic Label IDs” can be used in the API request for placing calls, these dynamic label IDs need to be created in self-serve after which the dynamic label ID can be copied from the Caller ID page in Self-serve.
API Rate Limits
- Truecaller for Business restricts API requests when you exceed the limits entitled to your business.
General Rate Limit Information:
- Requests Per Minute (RPM): The maximum number of requests allowed within a one-minute time window.
- A maximum of 10 tokens can be created every 30 minutes.
- Max 60 requests can be made every minute per token.
- Thus, if your business is using a batching logic, 10*60*500 = 300000 records can be processed every minute.
Note- Here, 500 is the batch size.
How to stay within limits:
- 1. Exponential Backoff: If you receive a "429" status code, consider implementing exponential backoff for retrying requests.
- 2. Prioritize Important Requests: If your application performs various tasks, prioritize critical requests over less essential ones to stay within limits.
Steps to place a Call through APIs
1: Create an API Key
- Login to the self-serve portal.
- From the overflow menu on the bottom left - select “Manage API Keys”.
- Click the “Create API Key” button, fill out the form and click “Generate”.
- Follow the instructions on the following page and download the API key and Key ID.
-
Generate an access token by using the following API:
curl --location 'https://enterprise-portal-noneu.truecaller.com/clients/{client_account_id}/token' \ --header 'X-Public-Access: allow' \ --header 'Content-Type: application/json' \ --data '{ "api_key": "api_key", "key_id": "key_id" }' - Use the “token” from the response as the Authorization header in the following APIs. This token is valid only for an hour. Token needs to be regenerated after following the above steps after expiry.
2: Creating Dynamic Labels (Self-serve)
- Navigate to the Caller ID details page from the Identity section.
- Click on create Caller ID.
- Select Dynamic Caller ID from Caller ID type selection and create the caller ID.
- Copy the Dynamic Label ID to be used from the Caller ID listing page.
- Use this Dynamic label ID for the API request.
3: List of all dynamic labels
GET /clients/{client_account_id}/labels HTTP/1.1
Host: enterprise-portal-noneu.truecaller.com
Content-Type: application/json
Accept: application/vnd.api+json; version=1.0
Authorization: Bearer {access_token}
4: Create Dynamic Call Records (API)
Note: Max 500 requests can be passed in one request
- Add the Access Token as bearer token in the authorization header.
-
Add entries in the “call_records” JSON array following
these criteria:
- Caller & receiver should be phone nos. without the “+” character
- ends_at should not be before the current timestamp
- starts_at and ends_at cannot be more than 24 hrs apart.
- label_id should be that of a dynamic label belonging to this client.
- Label name and call reason are optional fields
- The API response will return the no. of records uploaded and a batchID. Take note of this batchID.
POST /clients/{client_account_id}/dynamic_call_records HTTP/1.1
Host: enterprise-portal-noneu.truecaller.com
Accept: application/vnd.api+json; version=1.0
Content-Type: application/json
Authorization: Bearer {access_token}
Content-Length: 357

{
    "call_records": [
        {
            "caller": "1234567890",
            "receiver": "2345678901",
            "starts_at": 1684825738453,
            "ends_at": 1684843200000,
            "label_name": "Test Label",
            "call_reason": "Test Call Reason",
            "label_id": "{dynamic_label_id}"
        },
        { ... }
    ]
}
5: Get Dynamic Call Records Batch Status (API)
- Replace the batchId in the query param with the batchId obtained from the steps above.
- Add the Access Token as bearer token in the authorization header.
-
The API response will return the batch uploaded along with additional
fields:
- status - can be initiated/success/failure.
- error - will include an error message if status was failure.
- tries - this will always be 1 for now.
GET /clients/{client_account_id}/dynamic_call_records?batchId={batch_id} HTTP/1.1
Host: enterprise-portal-noneu.truecaller.com
Accept: application/vnd.api+json; version=1.0
Content-Type: application/json
Authorization: Bearer {access_token}
6: Start your calling operations
- All the numbers being used for dynamic calling operations will now show the dynamic caller ID.
- These numbers will revert to their normal identity once the TTL expires, which is currently set to 24 hours.